
How to Install a Kitchen Mixer Tap: A Comprehensive Step-by-Step Guide
Are you ready to tackle installing a kitchen mixer tap, but unsure where to start? This comprehensive guide is here to help! Whether you’re a seasoned DIY enthusiast or a homeowner curious about the process, we’ve got you covered. At Ross’s Discount Home Centre, we believe in empowering our customers with the knowledge and tools they need to succeed. That’s why we’ve crafted this detailed, step-by-step guide to help you install a kitchen mixer tap with confidence.
Proper installation is crucial for ensuring your mixer tap functions correctly and lasts for years to come. By following our expert instructions, you’ll avoid potential leaks and water damage, saving you time and money in the long run. So, let’s dive in and transform your kitchen with a brand-new kitchen mixer, all while enjoying the satisfaction of a job well done!
Gather the Necessary Tools and Materials

Before diving into the installation process, it’s crucial to have all your tools and materials ready to ensure a smooth and efficient job. Trust us, there’s nothing worse than getting halfway through a project and realising you’re missing a key item. So, let’s get you prepped and ready!
List of Tools Required:
- Adjustable wrench: For loosening and tightening nuts and bolts.
- Basin wrench: A lifesaver for those hard-to-reach areas under the kitchen sink.
- Screwdriver (flathead and Phillips): Because you never know what type of screw you’ll encounter.
- Plumber’s tape (Teflon tape): Essential for sealing threaded connections to prevent leaks.
- Plumber’s putty or silicone sealant: To ensure a watertight seal around the base of the tap.
- Measuring tape: To check the dimensions and ensure everything fits perfectly.
- Bucket or container: To catch any water that might spill when you disconnect the old tap.
- Cleaning cloth: For wiping down surfaces and keeping your workspace tidy.
- Utility knife (optional): For any trimming or cutting tasks that might come up.
List of Materials Required:
- New kitchen mixer tap: Make sure it’s compatible with your sink—check the specifications!
- Flexible hoses: Usually included with the tap, but double-check just in case.
- Mounting plate (if required): Some taps need this for a secure installation.
- O-rings or gaskets: These should come with your new tap to create a watertight seal.
- Stop valves: If your setup doesn’t already have these, now’s the time to add them.
Step 1. Prepare the Workspace

Alright, DIY warriors, the first step is to prepare your space for action. Prepping your workspace is crucial for a smooth installation process. Follow these steps to set yourself up for success.
Turn Off the Water Supply:
- Find the shut-off valve: Typically located in the water meter box at the front of your property, there may also be a dedicated valve for your kitchen sink. Make sure to turn off both the hot and cold water supplies.
- Relieve the pressure: Open the faucet to let out any remaining water and pressure. Let it drain into a bucket—you don’t want a mini flood on your hands!
Clear the Area:
- Empty the space: Remove any items stored under the sink. You’ll need ample room to move around.
- Lay down a towel or cloth: Place it under your workspace to catch any water or debris. This will save you some cleanup time later.
Disconnect the Old Tap:
- Detach the water supply hoses: Use your trusty adjustable wrench for this. Lefty loosey, righty tighty!
- Remove the securing nuts: If space is tight, grab your basin wrench. Unscrew the nuts that hold the old tap in place.
- Lift out the old tap: Carefully remove it from the benchtop or sink. Say goodbye to the old and hello to the new!
Step 2: Prepare the Benchtop or Sink

Now that your workspace is all set, it’s time to focus on the benchtop or kitchen sink. Ensuring the holes are the right size and in the right place is key to a smooth installation. Let’s get those measurements right!
Check the Existing Holes:
- Measure the holes: Grab your measuring tape and check the diameter of the existing hole(s) in your benchtop or sink. Make sure they match the requirements for your new mixer tap.
- Know your tap’s needs: Standard kitchen mixer taps typically require a single hole, but some fancy models might need two or more. Double-check the specs to avoid any surprises!
Drill New Holes (if necessary):
- Mark the spot: If the existing holes don’t fit your new tap, mark where the new holes need to go. Precision is key here—no one wants a wonky tap!
- Drill away: Use a hole saw to drill the new holes, ensuring the diameter matches your tap’s requirements. Take your time and let the saw do the work.
- Smooth the edges: Once the new holes are drilled, smooth the edges with a file or sandpaper. This step is crucial to prevent any damage to the hoses or fittings when you install the tap.
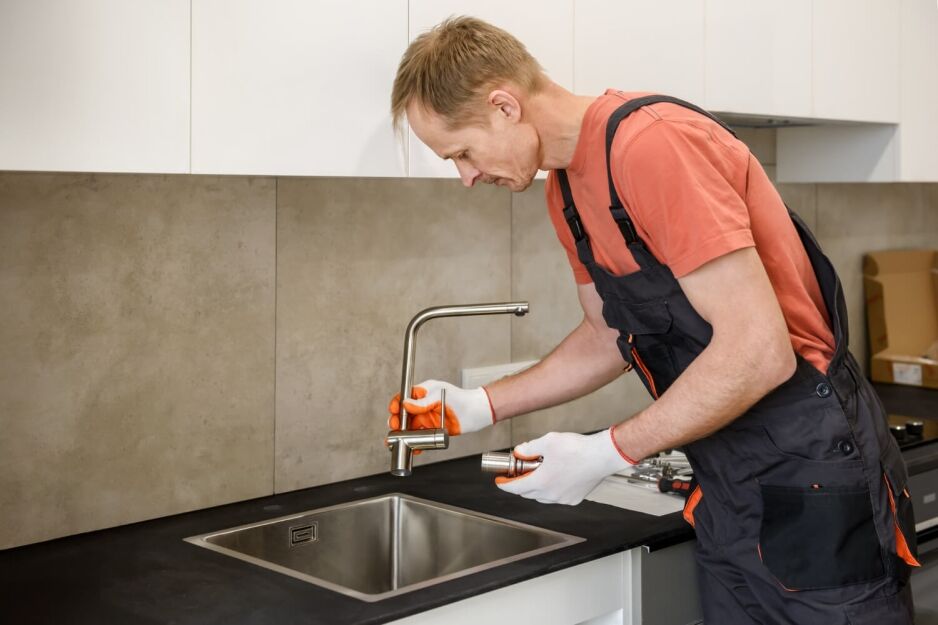
Step 3. Install the New Mixer Tap

Alright, the moment has arrived—let’s get that shiny new kitchen mixer installed and ready to rock! Here’s how to position and secure it like a plumbing pro.
Position the Tap:
- Insert the flexible hoses: Thread the flexible hoses through the mounting hole(s) in your benchtop or sink. Take your time here; you want those hoses to glide through smoothly.
- Align the tap: Make sure the tap is properly aligned with your sink. The base should sit flush against the benchtop, looking all neat and tidy.
Secure the Tap:
- Create a watertight seal: Slide the rubber gasket or O-ring (provided with your tap) onto the base. This step is crucial to prevent any sneaky leaks.
- Screw on the mounting nut(s): From underneath your kitchen sink, screw on the mounting nut(s) by hand first. Once they’re snug, use your adjustable wrench or basin wrench to give them a final tighten. But remember, don’t overtighten! Overzealous tightening can damage your benchtop or the tap itself.
- Ensure firmness: Make sure the tap is firmly in place but still aligned correctly. A wobbly tap is nobody’s friend, so double-check everything is secure.
Step 4. Connect the Water Supply
You’re in the home stretch now! It’s time to connect the water supply and get your new kitchen mixer ready for action. Follow these steps for a smooth and leak-free connection.
Attach the Flexible Hoses:
- Connect to the water supply lines: Take the flexible hoses from your mixer tap and connect them to the hot and cold water supply lines. Make sure you’re attaching the hot hose to the hot supply and the cold hose to the cold supply—no one likes a surprise cold splash!
- Use plumber’s tape: Wrap plumber’s tape around the threads of the water supply lines. This handy little trick ensures a tight, leak-free connection. Think of it as insurance against unwanted drips.
- Tighten the connections: Use your adjustable wrench to securely tighten the connections. But here’s the deal: don’t go all Hulk on it. Tighten enough to secure but not so much that you strip the threads. We want snug, not snapped!
Install Stop Valves (if needed):
- Add stop valves: If your setup doesn’t already have stop valves, now’s the time to install them. Place them between the water supply lines and the flexible hoses. Stop valves are an essential part of plumbing. They let you control the water supply, making it easy to shut it off whenever you need to.
Step 5. Test for Leaks and Final Adjustments
You’re almost there! Now it’s time to make sure everything’s working perfectly. Follow these steps to test for leaks and make any final adjustments.
Turn On the Water Supply:
- Slowly turn on the water: Head back to the shut-off valve and slowly turn the water supply back on. No need to rush; we want a controlled flow.
- Open your kitchen mixer: Turn your kitchen mixer on to let the water flow through. Keep an eye on those connections for any sneaky leaks.
Check Water Flow and Temperature:
- Test both hot and cold: Switch between hot and cold water to ensure everything’s flowing smoothly and the temperature control is spot on.
- Address any leaks: If you spot any drips, turn off the water supply and give those connections another tighten. Remember, snug is good, but avoid going full Hulk mode.
Make Final Adjustments:
- Secure the tap: Make sure the tap is firmly in place and properly aligned. You don’t want any wobble.
- Clean up: Wipe away any excess plumber’s putty or sealant around the base of the tap.
Step 6. Finishing Touches
Congratulations, you’ve made it to the final step! Now, let’s put on the finishing touches to ensure everything looks great and works perfectly.
Clean the Area:
- Wipe down your sink and benchtop: Grab a clean cloth and wipe away any debris, fingerprints, or water splashes. A sparkling clean surface makes all your hard work shine.
- Dispose of old parts and packaging: Gather up any old parts, leftover packaging, and waste materials. Dispose of them properly to keep your kitchen neat and tidy.
Check for Proper Operation:
- Final check: Turn the mixer on and off a few times to ensure it operates smoothly. Check for consistent water flow and make sure there’s no dripping when the tap is turned off.
- Water pressure: Ensure the water pressure is as expected. If it seems off, double-check your connections or consider adjusting your stop valves.
Additional Tips for Maintenance:
- Regularly check for leaks: Make it a habit to periodically check under the sink and around the tap base for any signs of leaks. Early detection can save you from bigger issues down the line.
- Clean the aerator: Unscrew the aerator (the little mesh filter at the end of the tap spout) and clean it regularly. This keeps your water flow steady and prevents any build-up of debris.
- Avoid harsh chemicals: When cleaning your mixer tap, stick to mild soap and water. Harsh chemicals can damage the finish and reduce the tap’s lifespan.
By following these finishing touches, you’ll ensure your new kitchen mixer tap not only looks fantastic but also operates flawlessly for years to come. Excellent work on completing your installation!
Conclusion
And there you have it—everything you need to know to install your new kitchen mixer tap like a professional plumber, but without the exuberant call-out fee! We’ve walked you through preparing your workspace, getting the benchtop or sink ready, installing the tap, connecting the water supply, and performing those all-important leak tests and final adjustments. Each step is crucial to ensure a successful, hassle-free installation. And, if you’re tackling a bathroom mixer, don’t miss our guide on How to Install a Basin Mixer Tap.
Remember, if you hit any snags along the way or if your plumbing setup is a bit more complex, don’t hesitate to seek professional help. Sometimes an expert touch is just what you need.
At Ross’s Discount Home Centre, we’re here to support you with a wide range of high-quality kitchen mixer taps and other tapware essentials. Feel free to drop by and speak with our knowledgeable staff for further guidance and recommendations. Happy installing, and may your new kitchen tap bring you many years of joy and convenience!