
How to Choose Bathroom Tiles: A Complete Selection Guide
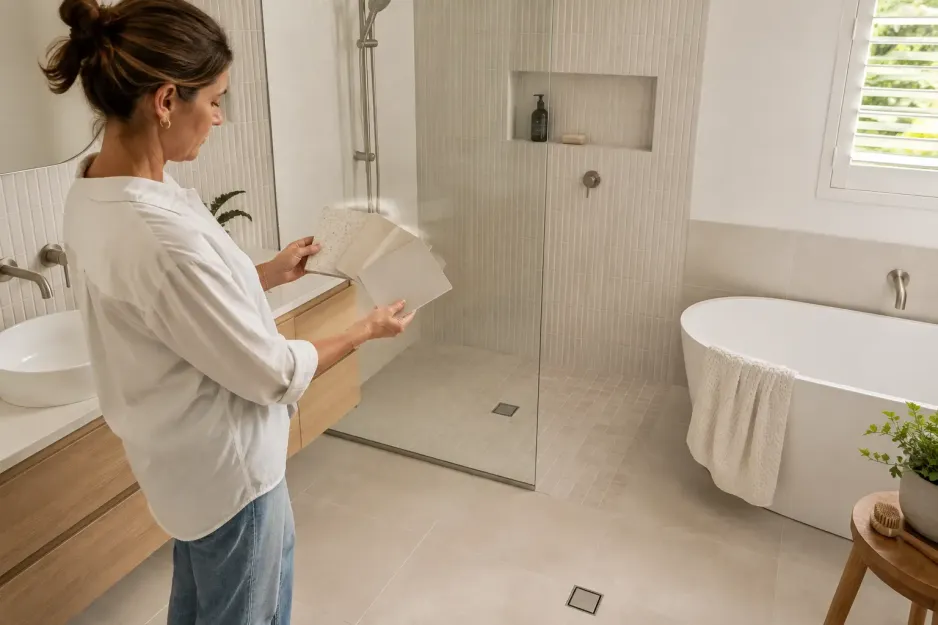
Bathroom tiles have to do different jobs across the same room. The tile you love for a shower wall may be the wrong choice for the main floor. A floor tile that performs well may not create the wall finish you want. That is why learning how to choose bathroom tiles starts with the surface, not the colour.
This complete bathroom tile selection guide brings those decisions into one place. I’ll show you how I help Perth renovators separate floor, wall and shower requirements before comparing tile size, material, finish, pattern and maintenance. Where a decision needs more detail, I’ll point you to our specialist guides covering wall tiles, floor tiles, slip resistance, shower floors, sizing, matching and feature tiles.
By the end, you’ll have a clear plan for choosing bathroom tiles for your renovation, testing samples and checking quantity, batch and shade before ordering.
How to Choose Bathroom Tiles in Five Steps
If you are unsure how to select bathroom tiles, this bathroom tile selection guide follows the order I use to narrow the options. Deal with practical requirements first, then make the design decisions.
- Map each surface. Separate the main floor, shower floor, general walls, shower walls and feature area.
- Verify suitability. Check each tile’s specified use and available wet-area or slip information.
- Plan size and layout. Review dimensions, drains, falls, cuts and grout joints with your installer.
- Coordinate the scheme. Compare colour, undertone, finish and pattern with other fixed finishes.
- Test and order. View samples in the room, then confirm quantity, batch and shade.
I use this order because it removes unsuitable options before colour and pattern drive the decision. You can create a bathroom you like, but each choice has a clear purpose. The sections below explain each step and point to specialist guides.
Step 1: Decide Where Each Tile Will Be Used

The first step in learning how to choose tiles for bathroom surfaces is to stop thinking of the room as one tiled area. Different types of bathroom tiles have different jobs, and a product that suits a dry wall may not suit a wet floor.
- Main bathroom floor: Consider wet feet, traffic, cleaning and how the floor meets the doorway, vanity and shower. Our bathroom floor tile guide covers suitability, formats and layout in more detail.
- Shower floor: Treat this as a separate zone because the waste position, floor falls and cuts affect the tile choice. Our shower floor tile guide explains these considerations in more detail.
- General walls: Decide how high the tiles will run and which areas receive regular splashes. Our guide to choosing bathroom wall tiles covers materials, sizes, finishes and layouts.
- Shower walls: These surfaces receive sustained water exposure, so the selected bathroom wall tiles must suit the location and work with the compliant wet-area system behind them.
- Feature area: A feature tile is optional. Give it a defined job, such as drawing attention to one wall or niche, rather than adding another pattern because it looks good alone.
I often meet customers in our Guildford showroom who have already chosen the wall tile that caught their eye, then try to make every other surface work around it. I find the process easier when we list the surfaces first and rule out anything unsuitable.
When choosing tiles for bathroom surfaces, record each zone and its approximate area. Note whether one tile may work across several compatible surfaces or whether you need separate products. This gives your supplier and installer a clear starting point without becoming a full measuring plan.
Step 2: Confirm Every Tile Is Suitable for Its Surface
A suitable choice comes down to the individual tile and where it will be installed. Ceramic, porcelain, matte, gloss, textured and grip finishes can all have a place in a bathroom. The label alone does not tell you whether a product suits a wet wall or floor.
Check the Product, Not Just the Label
People often ask what tiles are best for bathrooms. The best tiles for bathrooms are those specified for the intended surface, with the relevant wet-area and slip information available where floor safety matters. Check whether each product is intended for walls, floors, indoor areas or the particular wet location you have planned.
AS 4586:2013 classifies new pedestrian surface materials according to their frictional characteristics. That does not make one rating correct for every bathroom surface. Ask what product specification and slip-test information are available, then discuss the location and household needs with your supplier and installer.
A matte finish is not automatically non-slip. Texture does not prove safety, and small gloss tiles do not become suitable for a wet floor simply because they create more grout joints. If floor safety is a concern, our guide to non-slip bathroom floor tiles looks more closely at slip resistance in wet areas.
Understand Material and Finish Without Relying on Shortcuts
Ceramic and porcelain tiles can both suit bathroom applications. Porcelain is generally denser, but you still need to confirm the intended use of the individual product rather than treating the material name as approval for every surface.
Gloss and smoother finishes can be easier to wipe on some walls, although they may show glare, water marks or unsuitable floor performance depending on the tile. Matte and textured surfaces can offer a different look or more grip, but heavier texture may take more effort to clean. No finish description replaces relevant testing and product guidance.
Keep Tiles and Waterproofing Separate
Tiles and grout are the visible finish, not the waterproofing system. AS 3740:2021 sets minimum requirements for the materials, design and installation of waterproofing systems in domestic wet areas. Use an appropriately qualified installer and make sure the selected tile finish works with the compliant system behind it.
If you are renovating a WA home built before 1990, old wall or floor linings may contain asbestos. Arrange an appropriate assessment before demolition or disturbing those materials. Tile selection can wait until that safety question has been resolved.
Step 3: Plan Tile Size and Layout With Your Installer
Tile size changes more than the scale of the pattern. It affects grout joints, cut placement, alignment, waste and how the installer manages floor falls and drainage. If you are wondering what to consider when choosing bathroom tiles, test the format against the actual room before ordering.
Test the Format Against the Actual Room
Large-format tiles can create a calmer field with fewer grout joints, but they do not automatically make every small bathroom appear larger. Smaller formats can work well around detailed areas and tighter geometry, although the additional grout affects the finished look and cleaning.
A 600 × 600 mm tile can work on some bathroom floors. The room dimensions, shower configuration, waste position, floor falls and cuts decide whether it is a sensible choice. I prefer to see the floor plan before recommending a size.
Wall and floor grout lines do not always need to align perfectly. A deliberate tile layout matters more than forcing different formats into an awkward grid. Our guide to large vs small bathroom tiles explores the visual and practical differences in more detail.
Confirm the Layout Before Ordering
Ask your installer to review these points before you commit to the order:
- the room dimensions and finished floor level
- the shower configuration and waste position
- the required floor falls and likely cuts
- the tile edge type, including pressed or rectified edges, and the nominal dimensions
- the grout-joint width and alignment expectations
- the starting points, focal lines and any narrow cuts at walls or fixtures
- the pattern direction and likely wastage
This discussion is particularly useful when one tile continues across several surfaces or when wall and floor formats need to relate to each other. A small adjustment to the starting point can change which cuts remain visible and how balanced the room feels.
Choose the format only after the installer has confirmed that the proposed layout can be formed properly. That keeps size in its correct place: part of the room plan, not a rule based solely on whether the bathroom is large or small.
Step 4: Build a Bathroom Tile Scheme That Works Together
Once the practical checks are complete, bring the scheme together. Wall and floor tiles do not need to match exactly, but they should look deliberate beside the vanity, tapware and fixed finishes.
How Many Different Tiles Should You Use in a Bathroom?
Two or three coordinated tiles work well in many bathrooms, but there is no compulsory number. One tile can create continuity across compatible surfaces. A second may distinguish the floor or shower, while a third should have a clear purpose rather than being added because one sample looked appealing.
Room size is only one factor. Pattern variation, grout colour, the vanity top and tapware all affect how much detail the room can carry. I start with the dominant surface, then ask whether another tile solves a practical or design problem.
If you want a focal surface, our guide to choosing a bathroom feature tile explains how to introduce one without letting it compete with the rest of the room.
Coordinate Undertone, Pattern and Finish
If you are unsure how to pick bathroom tiles that work together, place the samples beside each fixed finish rather than judging them separately. Compare them with the vanity top, tapware and shower-screen frame under the lighting in the room.
Colour names are not enough. Two tiles sold as white may carry warm, cool, grey or blue undertones. Set the samples together and decide whether those differences feel intentional before ordering.
Give one element visual priority. If the floor has strong movement, quieter wall tiles can give it room to work. If the walls provide the main pattern, a restrained floor can support them. Treat this as guidance because scale and light change how strongly a pattern reads.
Tile finish changes the result. Gloss reflects more light, while matte and textured finishes scatter or absorb it differently. View patterned products across several faces or pieces so you can see how often the design repeats.
Bathroom wall and floor tiles do not have to match. Their undertones, pattern intensity, scale, grout colour and surrounding finishes should form one coherent scheme. Our guide on how to match tiles in the bathroom takes that process further.
If you’re still deciding between warm neutrals, cooler greys or a bolder accent, our guide to bathroom colour schemes for Australian homes will help you coordinate your tiles with paint, cabinetry and tapware before you commit.
Step 5: Test Samples, Set the Order Quantity and Check Every Box
Make the final decision in the conditions where the tiles will be used, not from a screen or one showroom sample. Testing now is much easier than discovering an unwanted undertone, difficult texture or quantity problem after installation begins.
Test Light, Colour and Cleaning
Light test. Place each sample vertically and horizontally in the bathroom. Check it during the day and under the artificial lighting you plan to use. A tile sold as white can appear blue, grey or cream because of its undertone, the direction of natural light and reflections from nearby finishes.
Water-mark test. Scheme-water hardness varies across Perth. If dried mineral marks are noticeable in your home, wet the sample and let it dry before deciding. Dark, glossy and heavily textured surfaces can show marks differently, so judge the actual product rather than relying on colour alone.
Cleaning test. Wipe the sample using the care method recommended for that product. Texture, tile colour, finish and the amount of grout all affect the cleaning involved. Do not use acidic or harsh cleaners unless the product guidance specifically allows them.
Confirm Quantity, Waste, Batch and Shade
Before placing the order, work through these checks in sequence:
- Ask your installer to confirm the measured area, proposed layout and required quantity.
- Use 10% extra as our common starting allowance for installation waste, not a fixed rule. Patterns, room geometry, tile format and difficult cuts may require more. When ordering through our online store, you can select the 10% wastage option to add this amount automatically.
- Confirm whether the required quantity can be supplied in the same batch and shade. Allow for intentional variation where the product is designed to show it.
- Check the lead time, special-order status and current tile-sale return conditions before paying.
- When the tiles arrive, check the product, colour, batch, shade and visible condition before anything is fixed.
Keep a few suitable spare tiles after installation for future repairs. Store them somewhere dry with the product or batch information if possible.
One of the hardest problems to solve is a customer needing a few more tiles after the original batch has gone. I would rather see a sensible spare quantity stored away than have someone trying to match a shade after the bathroom is finished.
These checks complete the practical side of your selection. You should now have a product that suits each surface, works with the planned layout, looks right in the room and can be ordered with fewer surprises.
Frequently Asked Questions About Choosing Bathroom Tiles
These are the questions I hear most often when homeowners are narrowing their bathroom tile shortlist.
Make Your Final Bathroom Tile Choice With Confidence
A confident choice starts with the job each tile needs to do. Define the surfaces, confirm that every product suits its location, review size and layout with your installer, then compare the full scheme in the room. Finish by checking cleaning, quantity, batch and shade before any tile is laid.
The best bathroom renovation tiles are not necessarily the most expensive or the strongest design statement. They are suitable for the intended surface, work together as a coordinated scheme and can be maintained without creating unnecessary work. That is the practical foundation of how to choose bathroom tiles well.
When your surface plan and shortlist are ready, shop bathroom tiles online or compare them in-store with help from our experienced team. Bring your measurements, finish samples and any installer notes to our Guildford showroom so we can help you compare appropriate options for your Perth bathroom renovation.
