
How to Clean Tiles: A Practical Tile Cleaning and Maintenance Guide
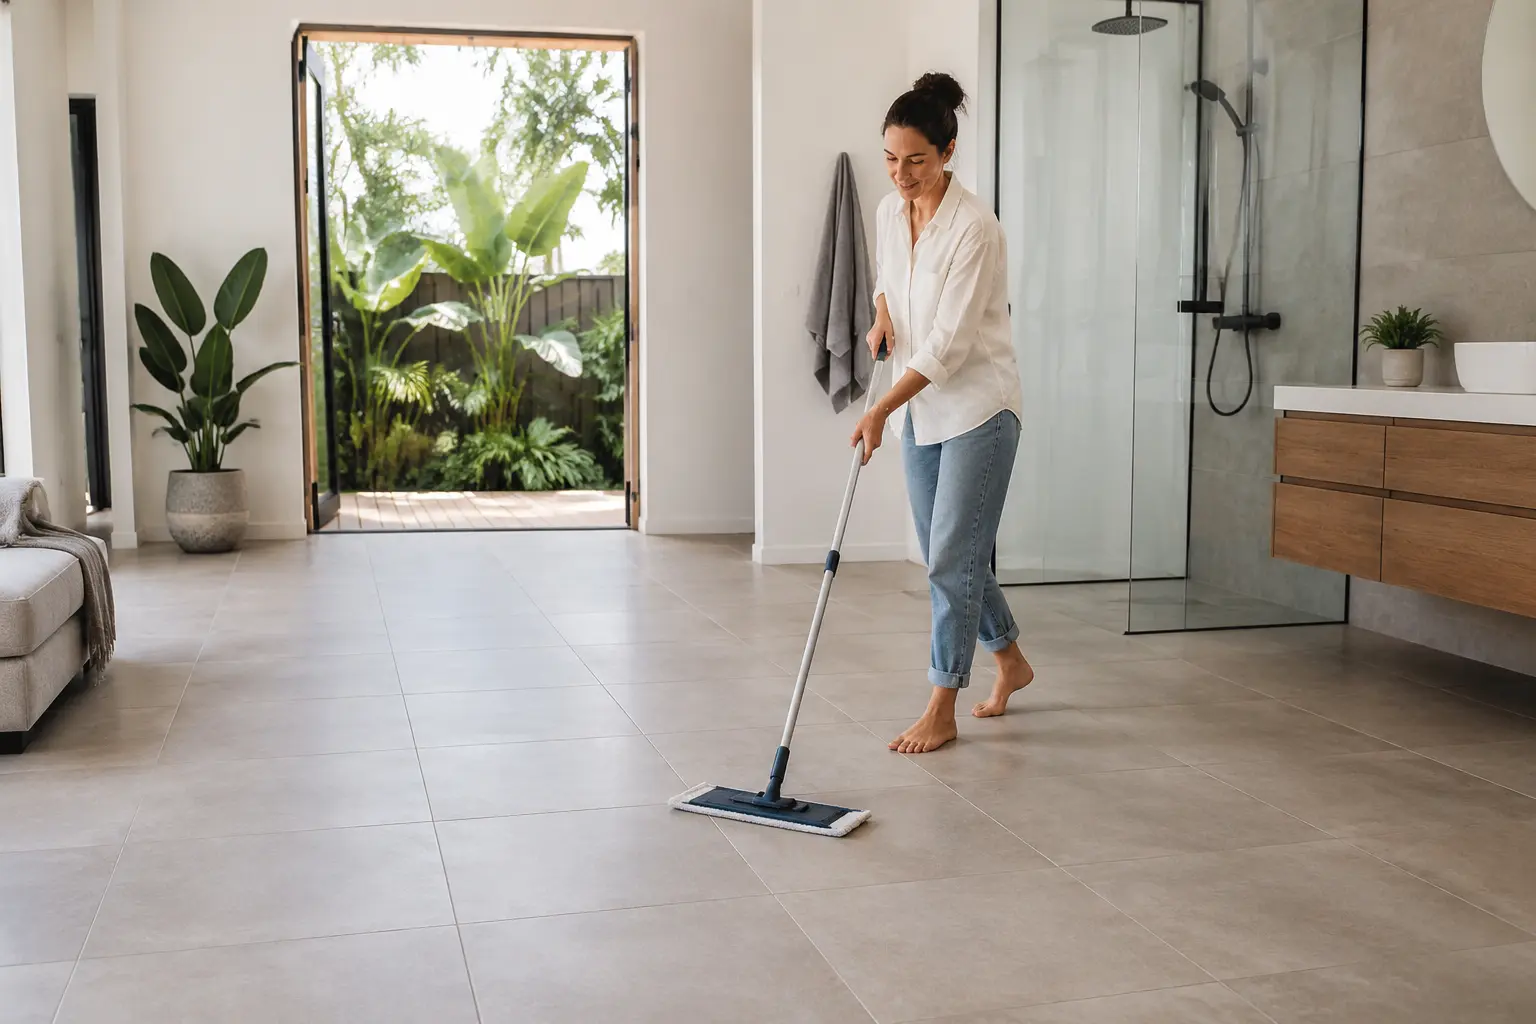
Learning how to clean tiles properly starts with knowing what you are cleaning. The product that cuts through soap scum in a shower may be completely wrong for matte floor tiles, grout or a sealed surface.
I always recommend starting gently. Remove loose dirt first, check the tile and cleaning-product care instructions, then test any unfamiliar cleaner in a spot that is easy to hide. Using more product or scrubbing harder can leave behind residue or damage the finish you are trying to protect.
In this guide, I’ll take you through safe tile cleaning for ceramic and porcelain tiles, including glazed, unglazed, matte and textured finishes. We’ll cover floors, walls, bathrooms and showers, along with grout, stains, streaks and newly laid tiles. I’ll also explain where methods such as vinegar, bleach, abrasives and steam can cause problems.
The aim is simple: clean the surface properly, protect the complete tiled area and avoid turning a small maintenance job into an expensive repair.
Identify Your Tile Before You Start Cleaning
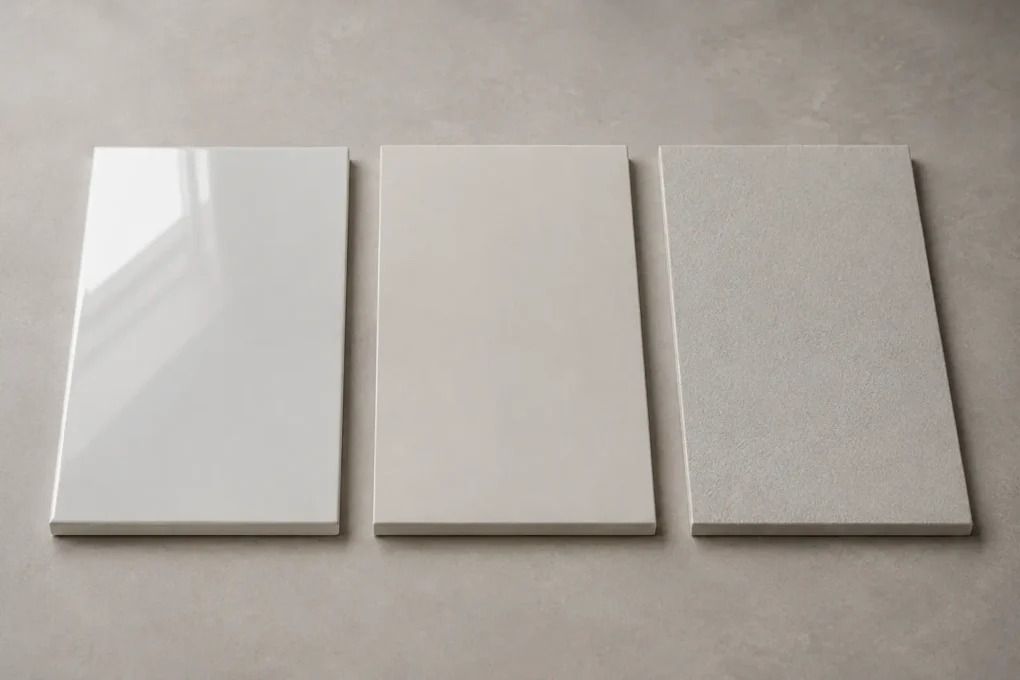
Before deciding how to clean tiles, identify the tile material and surface finish as accurately as possible. Ceramic tiles and porcelain tiles can have different properties, but the finish also matters. A glazed surface, unglazed tile, polished finish, matte finish and textured surface may each respond differently to cleaning products and scrubbing.
Appearance alone is not always reliable. A tile that looks like porcelain may be ceramic, while two porcelain tiles can require different care because one is polished and the other is textured. Grout, tile sealer and other surface treatments can also affect which products are suitable.
If possible, check leftover packaging, your invoice, the original product page or information supplied by the installer. Ross’s guide to tile finishes can also help you understand the surface you are working with.
Before cleaning, confirm what you can:
- Material: Ceramic, porcelain or another product.
- Finish: Glazed, unglazed, polished, matte or textured.
- Treatment: Sealed, coated or untreated, if known.
- Location: Floor, wall, shower or outdoor installation.
Do not assume every unglazed or polished porcelain tile needs sealing. Requirements vary by product, so check the tile manufacturer’s care instructions and any information provided with the sealer.
Natural stone requires separate care because some stone is sensitive to acids and other common cleaners. If you cannot confidently identify the surface, the best way to clean tiles is to begin with the gentlest suitable method and complete a test patch in an inconspicuous area.
Once you know what you are cleaning, you can choose the right products and tools without taking unnecessary risks.
What to Use to Clean Tiles Safely
Most routine tile cleaning needs fewer products than people expect. The right product and a clean, suitable tool matter more than a strong chemical smell or heavy scrubbing. If you are wondering what to use to clean tiles, start with a simple kit and confirm that every item is compatible with your tile and finish.
| Item | Best use | Important caution |
| Soft broom or suitable vacuum head | Removing grit and loose dirt | Avoid hard attachments that may mark the surface. |
| Microfibre mop or cloth | Routine washing and wiping | Start with a clean tool and rinse it regularly. |
| Soft nylon brush | Reaching textured surfaces or grout | Confirm that brushing suits the finish. Never use a metal brush. |
| Warm water | Light routine cleaning and rinsing | Do not flood the floor or grout. |
| Compatible pH-neutral cleaner | Routine cleaning when water alone is insufficient | Follow the product label and tile-care directions. A pH-neutral cleaner is not automatically suitable for every tile. |
| Two clean buckets | Separating cleaning solution from rinse water | Change dirty water before it spreads residue. |
I recommend starting with clean, soft tools and the smallest suitable amount of cleaning product. Follow the product label for dilution, contact time, ventilation, rinsing and personal protection. Using too much cleaner can leave a film that attracts dirt or makes tiles look streaky.
One of my simplest tile cleaning tips is to keep cleaning solution and clean rinse water separate. Rinsing a dirty microfibre mop in the same bucket can put grime straight back onto the surface.
You generally do not need a specialist machine or a cupboard full of cleaners. For routine care, correct tile identification, gentle tools, warm water and a compatible cleaner will handle most jobs safely.
How to Clean Tiles Without Damaging Them
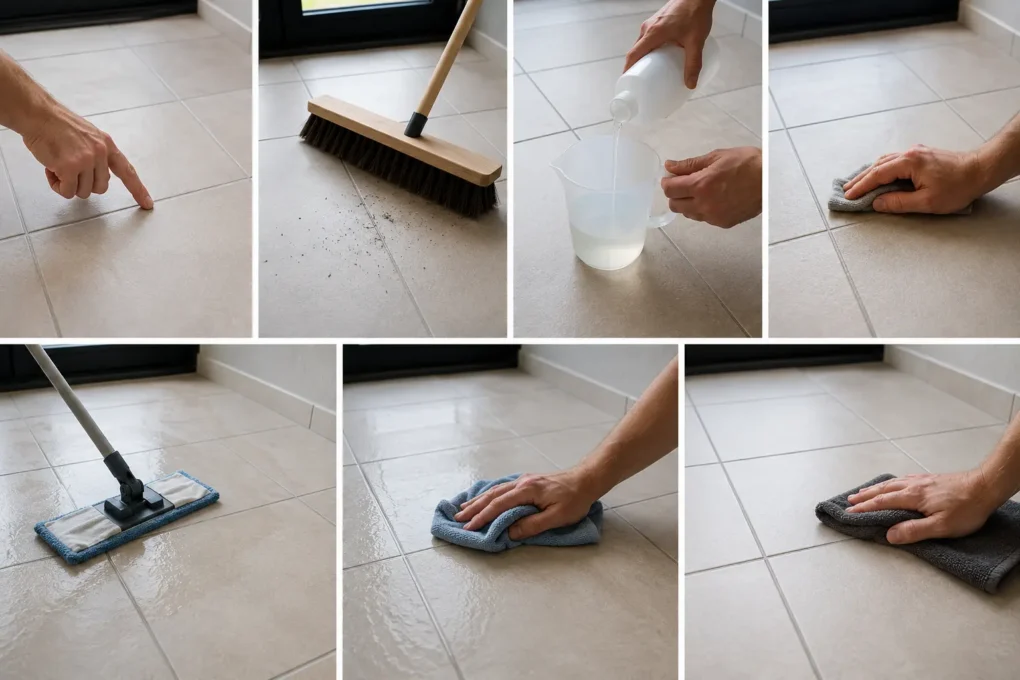
You can clean tiles without damaging them by confirming the tile and finish, removing loose grit and using a compatible cleaner with a soft tool. Follow the tile and cleaner manufacturers’ instructions, test unfamiliar products in a hidden area, avoid excess water, remove residue, then dry and inspect the surface.
Follow these steps in order:
- Confirm the tile and finish. Check the available product-care information and determine whether the surface has a tile sealer or another treatment. Choose a cleaner that suits the complete tiled area, including the grout.
- Remove loose dirt. Sweep with a soft broom or vacuum using a suitable head before adding water. Loose grit, sand and debris can scratch or mark some finishes when dragged across the surface.
- Prepare the cleaner correctly. Follow the product label for dilution, ventilation, personal protection and contact time. Adding extra product will not necessarily improve tile cleaning and can leave detergent film behind.
- Test an unfamiliar product. Apply it to a concealed test patch and follow the label directions. Let the area dry completely before checking for changes in colour, sheen or texture.
- Clean a manageable section. Use a damp microfibre mop, soft cloth or approved soft nylon brush. Work methodically and do not allow the cleaning solution to dry on the tile.
- Rinse or remove residue. Follow the cleaner manufacturer’s directions, as some products require thorough rinsing. Replace cloudy water before it spreads dirt or cleaning residue over the next section.
- Dry and inspect the tiles. Use a clean microfibre cloth to buff surfaces that show water marks or streaks. Let the area dry before deciding whether it needs another gentle clean or a different compatible product.
In my experience, people often add more cleaner when a tiled floor looks dull. The extra product can leave more film behind, so I check the dilution, rinse water and mop before recommending anything stronger.
Safety note: Stop immediately if the test area changes colour, sheen or texture. Do not continue across the whole surface in the hope that the finish will even out.
This process provides a safe starting point for how to clean tiles, but the right tool, water level and cleaning product will vary between tile materials and finishes.
How to Clean Different Tile Types and Finishes
Cleaning different tile types involves more than distinguishing ceramic from porcelain. A glossy glazed wall tile, matte porcelain floor tile and textured non-slip tile can require different tools, even though routine cleaning should always begin with a gentle method.
Use the surface itself, its treatment and the manufacturer’s instructions to guide your starting method.
| Surface | Routine starting method | Main risk to avoid |
| Glazed ceramic | Remove grit, then wipe or mop with a compatible mild cleaner | Scratching the glazed surface or dulling it with abrasive tools or residue |
| Porcelain | Use a compatible cleaner and soft microfibre tool | Assuming every polished porcelain, matte or textured surface responds identically |
| Unglazed tile | Confirm its porosity, treatment and manufacturer guidance first | Staining, uneven absorption or damage from unsuitable chemicals |
| Matte tile | Clean and rinse evenly without wax or shine products | Leaving detergent film or trying to create a gloss |
| Textured or non-slip tile | Use an approved soft nylon brush to reach surface recesses | Increasing chemical strength when better agitation and dirty-water removal may solve the problem |
The right method depends on the actual product, not simply its colour or whether it is installed in a bathroom, kitchen or living area.
How to Clean Ceramic and Porcelain Tiles
When people ask how to clean ceramic tiles, I generally recommend removing loose dirt before using a compatible mild cleaner and a soft cloth or microfibre mop. Rinse as directed and dry the surface if water marks or streaks remain.
The same basic process explains how to clean porcelain tiles, but the finish still matters. Porcelain tile cleaning should account for whether the surface is polished, matte, textured, glazed or unglazed. Do not assume every porcelain tile is stain-proof, maintenance-free or unsuitable for sealing. Check the care instructions for the specific product.
You can also view our ceramic tile range and porcelain tiles to better understand how the two materials are used.
How to Clean Glazed and Unglazed Tiles
A glazed surface is often easy to wipe clean, but abrasive pads, gritty debris and cleaner residue can scratch or dull it. Use soft tools and remove remaining product as directed.
An unglazed tile may be more absorbent, although porosity and treatments vary. Confirm whether the tile has been sealed or otherwise treated before selecting a cleaner. Sealing is not a universal requirement for every unglazed product.
How to Clean Matte Tiles Without Changing the Finish
The key with matte tiles is recognising that the matte finish is intentional. Clean the area evenly, rinse carefully and use clean drying tools to prevent visible residue.
Avoid waxes and shine-enhancing polishes unless the tile manufacturer specifically approves them. These products can alter the appearance, attract soil or affect the intended surface performance.
How to Clean Textured Tiles More Effectively
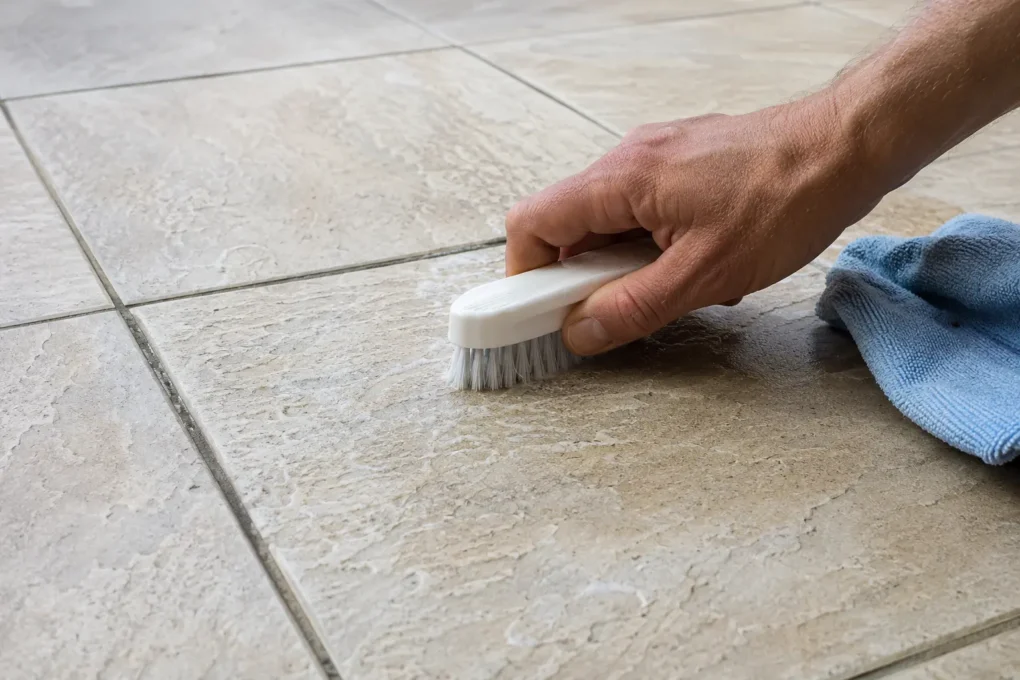
Effective cleaning for textured tiles starts with choosing a tool that reaches the low points. A flat mop may pass over small recesses and leave embedded dirt behind.
Work in manageable sections with a compatible cleaner and approved soft nylon brush, then remove the dirty water before it settles again. Better agitation and rinsing are safer starting points than drill brushes, coarse pads or stronger chemicals.
How to Clean Floor Tiles
For most homes, the best way to clean tiles on the floor is to remove loose grit first, use a correctly diluted compatible cleaner and mop with clean water and a clean tool. Dirty water, excess product and missed debris are common reasons mopping spreads grime instead of lifting it.
Follow this process when cleaning floor tiles:
- Clear the area and remove loose grit. Move small furniture, mats and other items that prevent you from cleaning the complete floor. Pick up larger debris before sweeping or vacuuming.
- Clean the edges and corners. Use a soft broom or a vacuum head suitable for the tile. Pay attention to skirting edges and grout lines, where sand, hair and dust often collect.
- Prepare the cleaner correctly. Choose a product that is compatible with the tile, finish, grout and any sealer. Follow the labelled dilution because too much cleaner can leave a sticky or dull film.
- Mop in manageable sections. Use a clean, damp mop with a microfibre head and overlap each pass so you do not miss narrow strips. Saturating the floor is unnecessary and can push dirty water into grout lines.
- Replace cloudy water. Dirty water puts soil back onto the floor, so change it as soon as it becomes cloudy. Rinse the tiles with clean water if the cleaning-product instructions require it.
- Dry and inspect the floor. Buff tiles that show water marks or streaks with a clean microfibre cloth. Keep children, pets and other household members off the wet tiled floor until it is dry and safe to walk on.
How often you need to dry-clean the floor depends on floor traffic and the household. Pets, children, open doors and Perth sand can bring in loose grit quickly, so some homes benefit from more frequent sweeping or vacuuming between washes.
If you are learning how to clean floor tiles with a textured surface, use the same process but add gentle agitation with an approved soft-bristle brush where the damp mop cannot reach. A matte tile should look evenly clean after drying, not artificially glossy.
Our range of floor tiles shows why finish and texture need to be considered alongside the tile material. Bathrooms and showers require further care because soap residue, water deposits and persistent moisture change the cleaning problem.
How to Clean Bathroom, Shower and Wall Tiles
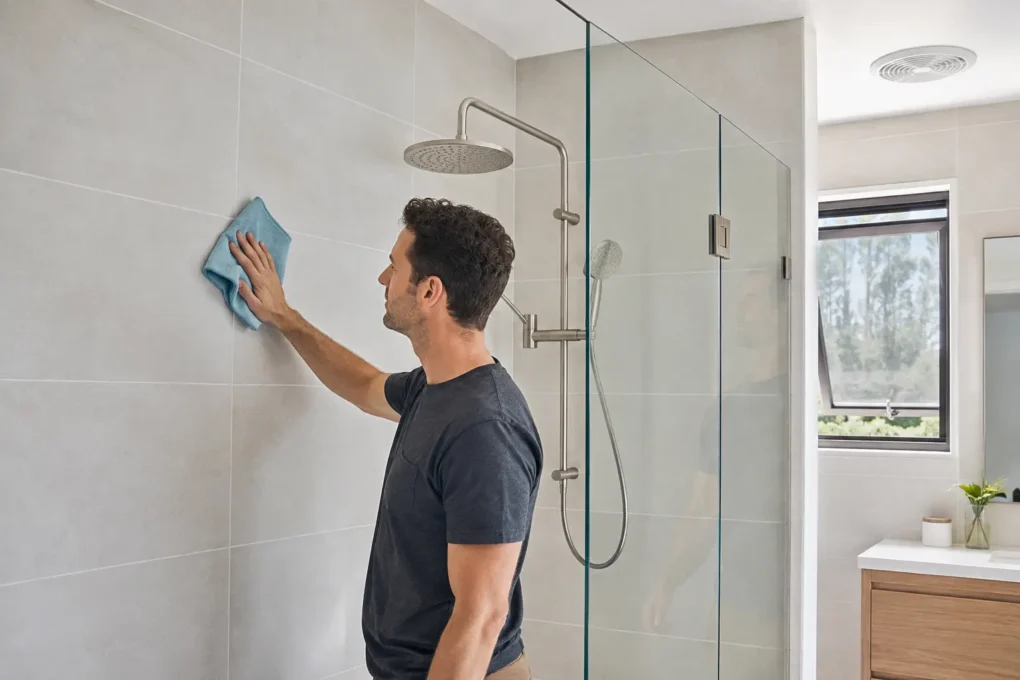
Bathroom tile cleaning involves different types of build-up from cleaning an ordinary floor. Soap, body products, water droplets and trapped moisture can combine on the surface, so identify whether you are treating general dirt, soap scum, mineral spotting or mould before choosing a product.
How to Clean Bathroom and Shower Tiles
To understand how to clean bathroom tiles safely, begin by removing loose hair, dust and dirt. Apply a compatible cleaner according to its label, leave it for only the stated contact time, gently agitate the surface if permitted, then rinse and dry it as directed.
The same process applies when learning how to clean shower tiles, although shower tile cleaning usually requires closer attention to corners, grout lines and areas beneath bottles. These places remain damp longer and can collect more residue.
Protect nearby tapware, shower-screen hardware, acrylic surfaces and silicone joints while you work. A product that is suitable for the tiles may damage another bathroom finish, so avoid overspray and check the cleaner’s restrictions before starting.
Our bathroom tiles include different materials and finishes, which is why I recommend checking the specific care instructions rather than treating every bathroom surface alike.
How to Remove Soap Scum From Tiles and Mineral Residue
Safe soap-scum removal starts with identifying the deposit. Soap scum is a film created by soap, body oils and other residues. Mineral spotting remains when water containing dissolved minerals evaporates and leaves deposits behind.
Some parts of WA experience hard water, particularly where groundwater contributes to the supply, but water conditions vary across Perth. If you suspect calcium deposits or mineral scale, confirm that the chosen lime or mineral-removal product suits the tile, grout, sealer, tapware and shower-screen fittings. Do not assume an acidic cleaner is safe.
How to Clean Wall Tiles Without Leaving Streaks
For wall tiles, work in manageable sections and prevent the solution from drying on the surface. Control drips and keep rinsed areas clear of dirty run-off rather than following a fixed top-to-bottom rule that spreads residue over clean tiles.
Rinse or remove the product as directed. Finish glossy wall tiles with a clean microfibre cloth if water marks or streaks remain.
How to Prevent Mould on Bathroom Tiles
Preventing mould on bathroom tiles requires moisture control as well as cleaning. Remove visible mould using a method compatible with the tile and surrounding materials, clean away residue, dry the area and improve ventilation where possible. HealthyWA’s mould and dampness guidance also recommends addressing the source of excess moisture.
Recurring mould can indicate persistent dampness, poor ventilation, failed silicone joints or another underlying problem. Cleaner alone cannot prevent mould permanently while the moisture source remains.
How to Clean Tile Grout Without Damaging the Tiles
Grout can hold dirt and moisture differently from the tile face. The best way to clean tile grout is to choose a method that suits the grout, surrounding tiles and any tile or grout sealer rather than treating the joints in isolation.
If you are working out how to clean grout between tiles, begin with the compatible routine cleaner already approved for the tiled surface. Apply it as directed, gently agitate the joints with an approved soft nylon grout brush, rinse away the residue and dry the area.
For a dedicated grout cleaner, read the product directions and confirm compatibility with the tile finish, grout type and sealer. Complete a test patch before treating a large area. Avoid metal brushes, aggressive scraping and repeated use of unapproved acidic products, as these methods can damage the grout or adjoining tile surface.
If grout stays dark after cleaning, first consider what you are seeing:
- Dirt: Usually sits on or within an otherwise sound grout joint and may respond to a compatible cleaner and gentle brushing.
- Mould: Requires suitable removal as well as better ventilation, drying and control of the moisture source.
- Deterioration: Cracking, crumbling, powdering or missing sections need repair assessment rather than a stronger cleaner.
Dark grout is not always dirty grout. It may be the grout’s original colour, embedded soil, mould, worn sealer or deterioration. I recommend letting a cleaned test area dry fully before deciding whether the treatment has worked, as wet grout often appears darker.
Cleaning cannot repair cracked, loose, powdering or missing grout. Seek advice from the installer, grout manufacturer or another suitably qualified professional if joints are failing or you cannot identify the residue.
If the grout appears clean but the complete surface still looks cloudy, the problem may be detergent film, mineral deposits or grout haze on the tiles rather than dirt within the grout lines.
How to Fix Streaks, Stains and Grout Haze
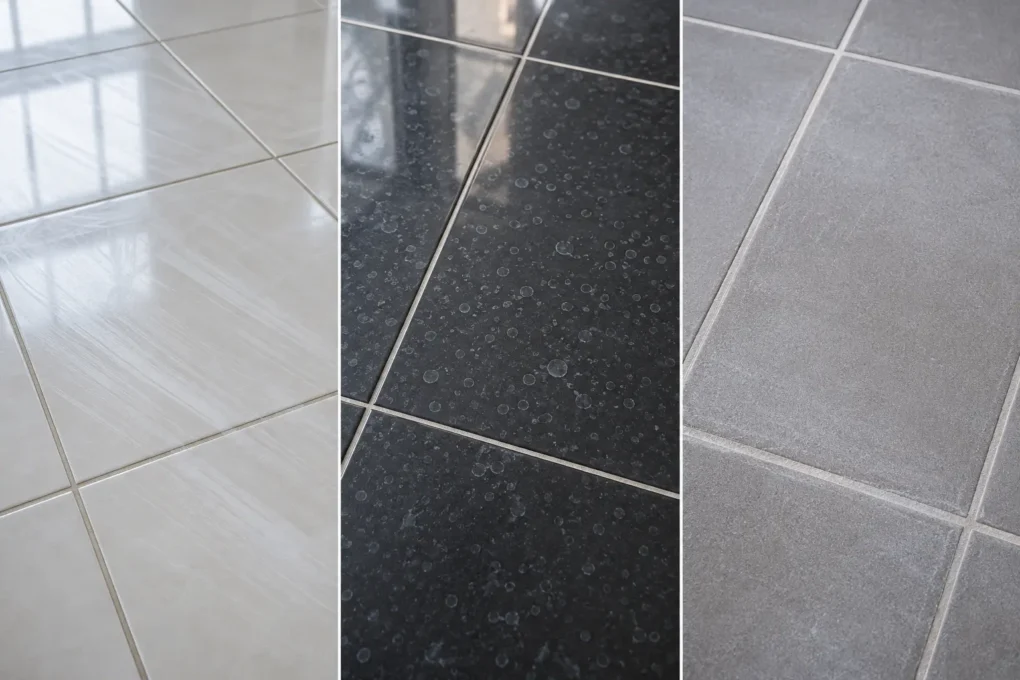
If tiles still look dirty after cleaning, stop adding cleaner and identify the likely cause. The problem may be detergent film, mineral spotting, surface texture, staining, sealer residue or grout haze. Repeated cleaning with the wrong product can make the appearance worse without addressing the deposit.
Why Tiles Look Streaky or Cloudy After Cleaning
Excess cleaner, cloudy water, incomplete rinsing, unsuitable soap, wax build-up, water spotting and a dirty mop head can all leave tiles looking streaky or cloudy.
The first step in how to prevent streaks when cleaning tiles is to use the labelled amount of product and replace dirty water and tools promptly. Test a small section using fresh water, a clean microfibre mop or cloth, and the residue-removal process approved by the cleaner and tile manufacturers. Let the area dry before comparing it with the surrounding tiles.
Remember that matte tiles are designed to have a low-sheen appearance. A clean matte surface may still look dull compared with a glossy tile.
How to Remove Stains From Tiles Safely
Safe stain removal starts with identifying what caused the mark. Blot fresh spills rather than spreading them, then choose a compatible product for that particular substance. Follow the stated contact time, rinse as directed and inspect the area once dry.
Rust, paint, oil, organic staining and mineral scale can require very different treatments. I do not recommend experimenting with homemade mixtures or unidentified solvents. Check the tile and cleaning-product instructions, and do not assume every stain can be removed completely without affecting the finish.
How to Clean Newly Laid Tiles After Grouting
The correct method for how to clean tiles after grouting depends on the grout product and whether the residue is still fresh or has cured. During installation, follow the grout manufacturer’s cleaning window because early clean-up and cured haze require different treatment.
When learning how to clean newly laid tiles, distinguish between fresh grout residue, cured cement-based grout haze and cured epoxy grout residue. Epoxy grout haze can be particularly difficult to remove once it hardens.
If you do not know which grout was used, ask the installer before applying another product. The tile and grout manufacturers can identify a compatible grout-haze remover and explain the correct process. Do not default to acid, paint stripper, scraping blades or aggressive pads.
A remaining haze does not necessarily mean the tiles are permanently damaged. However, further treatment should wait until you know whether you are dealing with grout haze, detergent film, mineral spotting or sealer residue.
Tile Cleaning Products and Methods to Use With Caution
A cleaning method can appear to work on the tile face while damaging the grout, tile sealer, glaze or nearby fittings. Product compatibility must cover the complete installation, not only the most visible part of the tile.
- Vinegar and acidic cleaners: Vinegar should not be treated as a general-purpose tile cleaner. An acidic cleaner can affect acid-sensitive materials, cement-based grout, some sealers and nearby fittings. Use an acid-based product only when the relevant manufacturers approve it for the specific surface and deposit.
- Bleach and strong chemicals: I do not recommend bleach for routine tile cleaning or a homemade bleach dilution. Only use a strong chemical when the product manufacturer and surface-care instructions permit it for the particular problem. Follow every label direction.
- Abrasive powders and tools: Steel wool, metal brushes, scouring powders, coarse pads and unapproved drill brushes can scratch, dull or otherwise alter a tile surface. More force is not always the answer, particularly on glazed, polished or matte finishes.
- Steam cleaners: Do not assume a steam cleaner is safe simply because the tiles are ceramic or porcelain. Confirm suitability with the tile, grout, sealer and steam-appliance manufacturers. Heat and moisture can affect other parts of the tiled installation.
- Pressure cleaners: I do not recommend using a pressure cleaner on indoor tiles. Even outdoors, concentrated pressure can affect grout, joints, sealers and surrounding construction. Check the installation and equipment guidance before proceeding.
- Wax and shine products: These products can alter the intended appearance and create build-up that traps soil. They may be particularly unsuitable for matte or slip-resistant surfaces that were not designed to look glossy.
Chemical safety
- Never mix cleaning products. Bleach must never be mixed with ammonia or any other cleaner.
- Follow the product label and all safety directions.
- Keep cleaning products in their original containers.
- Ventilate the room during use and drying.
- Wear any gloves, eye protection or other protective equipment specified on the label.
- Keep children and pets away while products are in use and until the area is dry.
A method that worked in another home may not suit your tiles. The unseen finish, grout, sealer, adjoining materials and previous treatments may all be different, so check compatibility before copying someone else’s result.
How to Maintain Tiles and Prevent Build-Up
Regular light cleaning is usually easier on tiles than waiting for heavy build-up and then reaching for a stronger product. Good tile care and maintenance focuses on preventing grit, spills, residue and moisture from becoming harder to remove.
If you are wondering how to maintain tiles without turning it into a constant job, concentrate on a few practical habits:
- Remove Perth sand and other loose grit before floor traffic carries it across the tiles.
- Clean spills before they dry, stain the surface or enter grout lines.
- Place entrance mats at frequently used doors and pet access points.
- Replace cloudy mop water rather than spreading dirt over the next section.
- Wash reusable mops, brushes and cloths after use, then let them dry fully.
- Dry shower surfaces when practical to reduce soap residue and mineral spotting.
- Use exhaust fans and other suitable ventilation to reduce lingering moisture.
- Follow the cleaner’s labelled dilution instead of adding extra product.
There is no single daily, weekly or monthly schedule that suits every tiled surface. Children, pets, indoor-outdoor access, floor traffic, wet-area use and surface texture all affect how quickly dirt and residue accumulate. A textured entry floor exposed to sand will usually need attention more often than a lightly used tiled wall.
The simplest approach to how to keep tiles clean is to remove visible dirt promptly, spot-clean spills and wash the surface when residue begins to appear. In my experience, this is more manageable than allowing several different types of build-up to collect and then trying to solve everything with one aggressive deep clean.
Pay particular attention to bathrooms and other wet areas. Ventilation, moisture control and regular drying can reduce persistent build-up, but recurring mould or deteriorating grout may need closer investigation.
Even with a sensible routine, questions often remain about cleaning frequency, vinegar, steam mops and grout condition. The following answers cover those common concerns.
Frequently Asked Questions About Tile Cleaning
The right answer depends on the tile material, finish, grout, sealer and product instructions. These FAQs explain what to use to clean tiles and how to clean tiles without damaging grout or the surrounding finish.
Choose the Safest Cleaning Method for Your Tiles
The safest way to decide how to clean tiles is to identify the tile and finish, check the product instructions, then begin with the gentlest compatible method. Remove loose grit, use clean tools, control the amount of cleaner, remove residue as directed and dry the surface where needed.
More chemical strength or scrubbing pressure is not automatically the answer when tiles remain cloudy or stained. If the appearance does not improve after a careful test clean, stop and identify whether you are seeing grout haze, sealer residue, damaged glaze, deteriorated grout, mineral deposits or another underlying issue.
We regularly discuss cleaning and maintenance while helping customers choose tiles because an easy-care option depends on the room, surface finish and household. A smooth wall tile and a textured wet-area floor serve different purposes, so they should not be judged by the same cleaning routine.
If you are planning a renovation or need to replace permanently damaged tiles, explore our complete tile range online or speak with our experienced team at the Guildford showroom. We can help you choose a suitable tile for the location, finish and level of household use.
