
Choosing Bathroom Wall Tiles: 12 Essential Tips
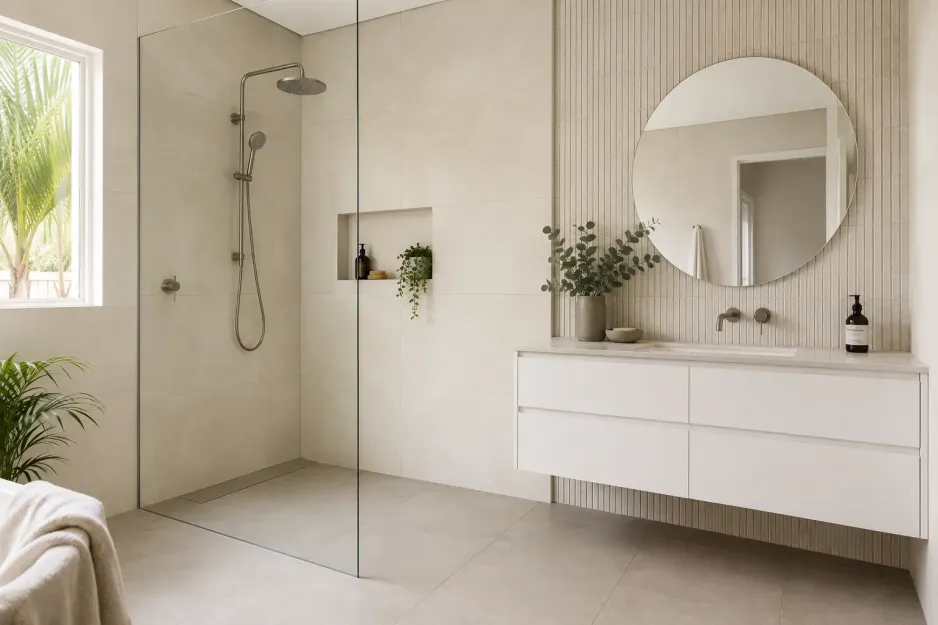
A bathroom tile can look right on a sample board and still be wrong for the wall you have in mind. Shower walls, vanity splash zones and walls outside direct water exposure each place different demands on the tile and the installation behind it.
I always start by asking Perth homeowners where the tile will go. That one answer makes choosing bathroom wall tiles much easier because you can compare material, finish, size, layout and cleaning needs against the actual application. In this guide, I’ll explain how to shortlist suitable tiles for bathroom walls, coordinate them with the floor and add a feature tile without letting it take over the room.
1. Start with Where the Bathroom Wall Tile Will Go

The best tiles for bathroom walls depend on the exact position, not just the room name. A tile beside a vanity faces different conditions from one inside a shower. Identify the wall and its water exposure before comparing colours, patterns or finishes.
- Shower walls: These surfaces face regular direct water, soap residue and cleaning. Confirm that the exact tile is suitable for shower walls and practical to maintain. The tile must also work with the substrate, adhesive and waterproofing system specified for the shower.
- Walls behind a bath: A freestanding bath may create occasional splashes, while a shower-over-bath creates a much wetter application. I always ask which setup is planned because the difference changes what the wall system needs to handle.
- Vanity splash zones: Tiles behind a basin need to cope with water, toothpaste, cosmetics and regular wiping. Smooth, easy-to-clean surfaces are often more practical here than heavily textured designs.
- Walls outside direct splash areas: These walls give you more freedom with texture and decorative finishes. They still need to suit a humid bathroom and the cleaning products used in the room.
- Full-height or partial tiling: Decide how far the tiles will extend before ordering. The choice affects quantities, cuts, exposed edges and the transition between tiled and painted surfaces.
Bathroom wall tiles and grout form the visible finish. They do not replace the waterproofing required behind them in wet areas. Your tiler or responsible installer should confirm the substrate, waterproofing, adhesive and complete installation system before you order.
If you are comparing wall applications beyond the bathroom, our guide to choosing wall tiles explains how tile weight, substrate, finish and exposure affect the choice. For this bathroom guide, the first decision remains simple: identify the exact wall, then remove any tile that does not suit that application.
2. Compare Ceramic and Porcelain Bathroom Wall Tiles
Ceramic and porcelain can both provide suitable tiles for bathroom walls. The better choice depends on the exact product, wall location, tile weight, finish and installation requirements. Porcelain is not an automatic upgrade for every bathroom wall.
| Consideration | Ceramic Wall Tiles | Porcelain Wall Tiles |
| Construction | Ceramic tiles are made from fired clay and are commonly available as glazed, wall-specific products. | Porcelain tiles have a denser body and lower water absorption than standard ceramic tiles. |
| Handling | Dedicated ceramic wall tiles can be lighter and easier to cut around fittings, niches and power points. | Porcelain can be heavier and harder to cut, particularly in large formats. |
| Available finishes | Ceramic bathroom wall tiles come in many colours, patterns, gloss finishes and decorative formats. | Porcelain bathroom wall tiles include matt, polished, textured, stone-look and marble-look options. |
| What to confirm | Check that the exact product suits the intended wall and any direct wet-area exposure. | Check the application, tile weight, substrate capacity, cutting requirements and compatible adhesive. |
| Best suited to | Bathroom walls where a suitable wall-specific format provides the preferred finish and practical installation. | Walls where the exact porcelain product, substrate and installation system suit its size and weight. |
I do not treat porcelain as the best choice simply because it is denser. A good-quality ceramic wall tile can be a practical option, especially when the layout includes several fittings or detailed cuts. Porcelain may provide the format or finish you want, but your tiler should confirm that the wall and fixing system can support it.
The surface matters as much as the tile body. A smooth glazed ceramic tile may be easier to wipe than a deeply textured porcelain tile. Compare the actual finish, grout-joint count and cleaning needs rather than assuming one material will always require less maintenance.
If you are deciding between the two materials, our guide to porcelain and ceramic tiles explains how their characteristics affect different applications.
Ross’s stocks stone-look and marble-look tiles rather than natural marble or natural stone tiles. These products can provide the appearance of stone with care requirements determined by the exact tile and finish. Always check the individual product information before deciding where it can be used.
3. Choose Suitable Tiles for Shower Walls
The best tile for shower walls is an exact product confirmed for that wet-area application. It should be practical to clean and compatible with the complete wall system behind it. Colour and pattern come after those checks.
Compared with bathroom wall tiles outside direct splash zones, shower wall tiles face regular water, soap residue and frequent cleaning. Check the following before ordering:
- Approved application: Confirm that the manufacturer identifies the exact tile as suitable for shower walls. Do not assume every decorative, textured or wall-labelled tile can be used inside a shower.
- Surface and cleaning: Smooth glazed surfaces are generally easier to wipe than deep grooves or raised textures. Textured tiles can work, but think about where soap residue and hard-water marks may collect.
- Tile size and weight: Large-format tiles can reduce the number of grout joints, but they may be heavier and require a flatter substrate. Your tiler should confirm that the wall, adhesive and fixing method suit the selected format.
- Set-out: Plan around niches, mixers, shower outlets, screens, corners and other penetrations. A set-out completed before ordering can reduce awkward cuts and narrow tile strips.
- Complete wall system: Tiles and grout are surface finishes. They do not make the shower waterproof. The substrate, membrane, junctions and penetrations must form a compliant wet-area system behind the tiles.
The NCC wet-area waterproofing provisions set requirements for shower walls, wall junctions and other building elements exposed to water. Your tiler or responsible installer must confirm how those requirements apply to the bathroom.
Do not choose tiles for shower walls by looking for a floor slip rating. Slip classifications apply to pedestrian surfaces, not vertical shower walls. On a wall, focus on approved use, cleanability, weight, set-out and compatibility with the installation system.
I pay close attention to grout-joint count in Perth showers. Fewer joints can reduce the amount of grout that needs cleaning, but that benefit only matters when the tile size works with the wall dimensions and fittings. A well-planned smaller tile can give a better result than a large tile forced into an awkward layout.
4. Decide Between Gloss, Matt and Textured Bathroom Wall Tiles
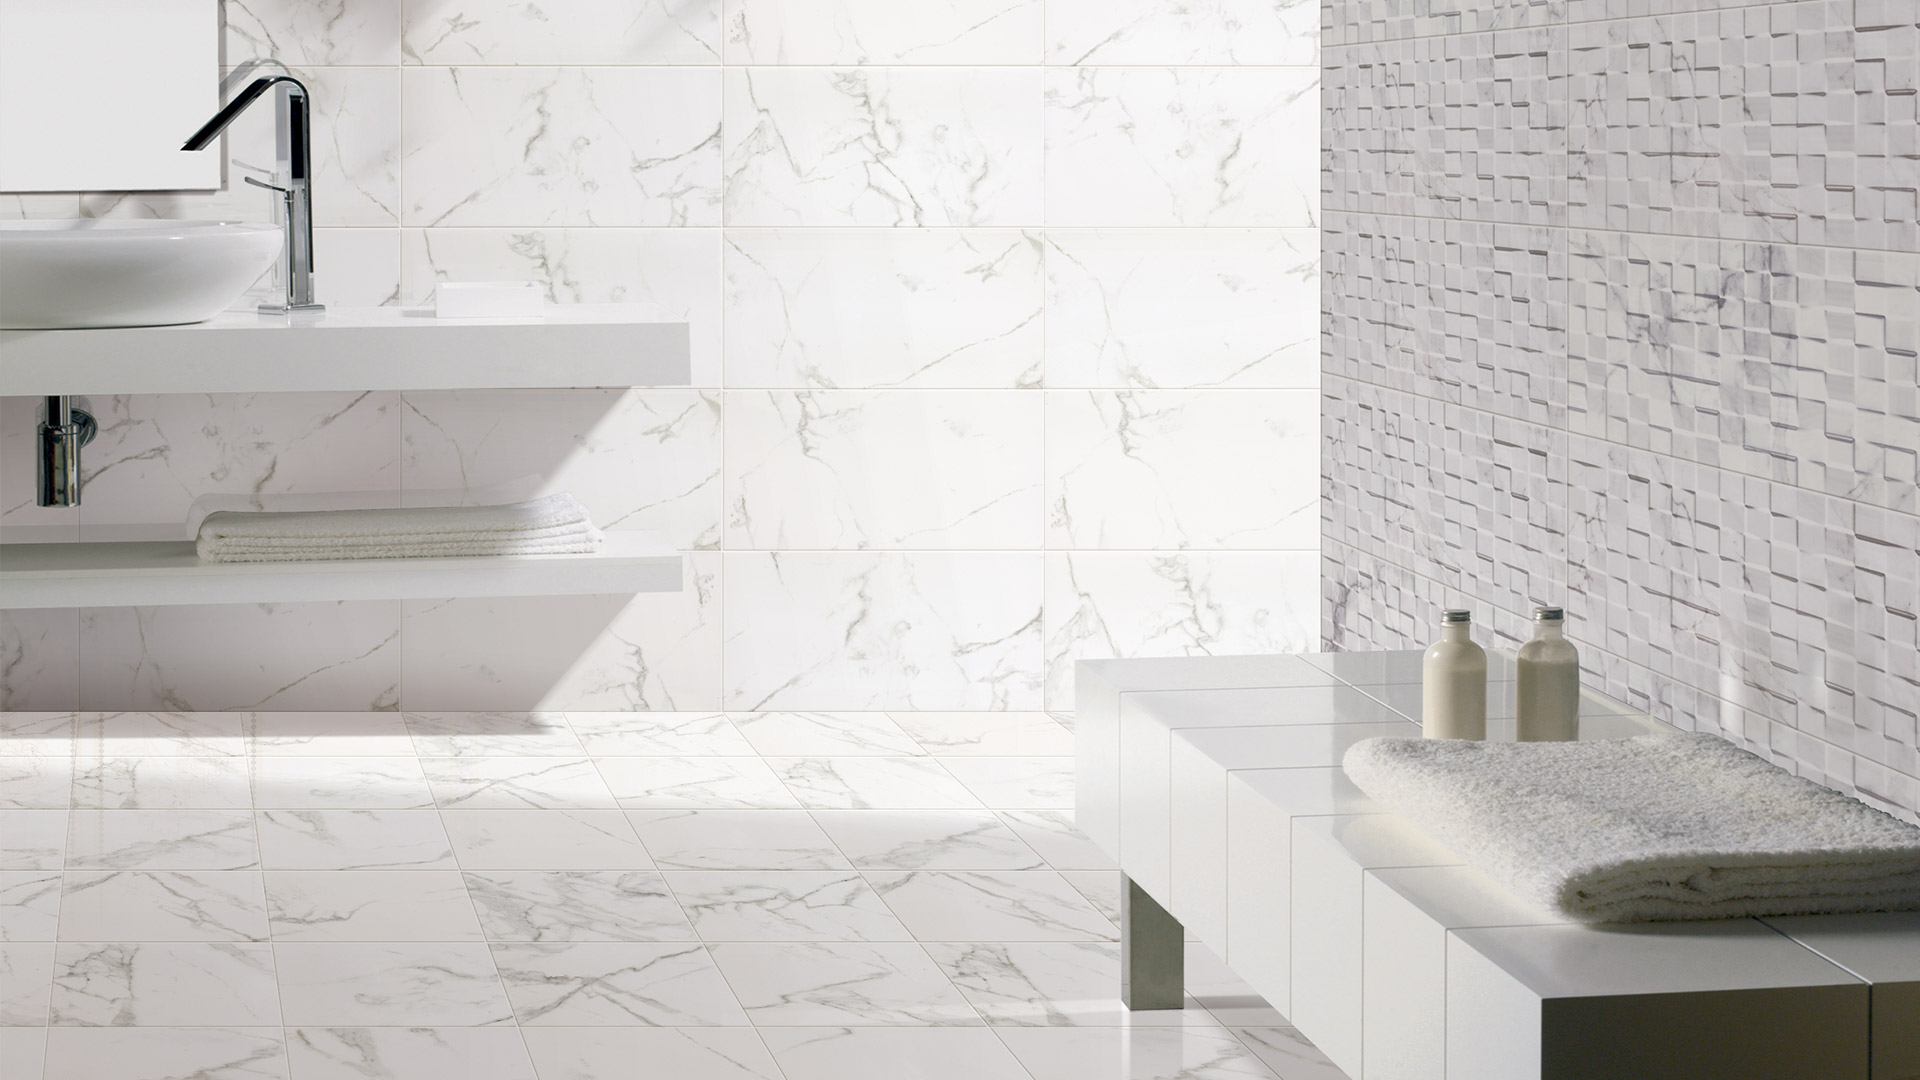
The finish of bathroom wall tiles affects reflected light, cleaning and the amount of visual texture in the room. Do not rely on the finish label alone. Two tiles described as matt or textured can feel very different when you run your hand across the surface.
| Finish | Useful Qualities | What to Consider |
| Gloss | Gloss bathroom wall tiles reflect light and can help a darker room feel brighter. A smooth glazed face is often straightforward to wipe. | Reflections, fingerprints, soap marks and dried water spots may be more noticeable, particularly on darker colours. |
| Matt | Matt bathroom wall tiles provide a softer, lower-sheen appearance. They work well where you want less reflection from lighting or windows. | A matt label does not guarantee easier cleaning or better mark concealment. Check the actual surface texture before deciding. |
| Textured | Textured bathroom wall tiles add depth through ripples, grooves or raised details. They can introduce interest without relying on a strong colour or pattern. | Deep texture may collect soap residue, dust or mineral deposits. Consider the amount of cleaning required in shower and vanity splash zones. |
I recommend viewing tile samples upright under lighting similar to the bathroom. A tile laid flat on a showroom table will catch light differently from one installed on a wall. Moving the sample between natural light and artificial light can also reveal reflections or surface details that were not obvious at first.
Think about who will clean the bathroom and how often. Smooth tiles can be a practical choice around vanities and inside showers, while stronger textures may be easier to manage on walls outside direct splash zones. If your home has hard water, dried mineral marks may show more clearly on some dark or glossy surfaces.
Finish does not determine wet-area suitability. A gloss, matt or textured tile still needs to be approved for the exact wall application. Once that is confirmed, choose the surface that gives you the preferred look without creating more cleaning work than you are prepared to manage. Our guide to the different types of tile finishes provides a closer comparison of finish options and their practical benefits.
5. Choose Colour for the Room and Lighting
Bathroom wall tile colour affects brightness, contrast and how the other finishes read in the room. Room size matters, but it should not control the decision on its own. Natural light, artificial lighting, floor tiles, cabinetry, benchtops, tapware and grout all change how a colour appears.
Light Bathroom Wall Tiles
White, beige, pale grey and other light colours reflect more available light. They can help a bathroom feel brighter, particularly where the room has a small window or limited artificial lighting.
Light does not have to mean plain. Variation in tone, surface texture or a subtle pattern can add interest without introducing a strong contrast. Check the undertone carefully because warm and cool whites can look noticeably different beside cabinetry and benchtops.
Dark Bathroom Wall Tiles
Charcoal, black, navy, deep green and other dark colours can create depth and provide contrast against lighter fixtures. They can work in both large and small bathrooms when the lighting and surrounding finishes support them.
You do not need to rule out a dark tile because the bathroom is compact. Using it on selected walls, pairing it with a lighter floor or adding good task lighting can keep the room balanced. Dark gloss tiles may show dried water marks more clearly, while dark textured surfaces can create their own cleaning considerations.
Check Tile Colours in the Actual Light
If you are collecting bathroom wall tile ideas, compare samples in the room rather than choosing from a screen. Stand them upright and look at them during the day and at night. Artificial light can shift beige, grey, white and green tones more than many people expect.
Perth bathrooms vary from bright rooms with strong daylight to internal ensuites with no direct window. I always recommend checking a sample beside the planned floor tile, vanity finish and tapware. A bathroom wall tile design feels more resolved when those surfaces work together rather than being chosen separately.
For more help building a coordinated palette, our guide to bathroom colour schemes for Australian homes covers current combinations and practical ways to use them. Choose the colour after seeing it under the bathroom’s actual lighting, not because a general rule says light or dark is best.
6. Select Tile Size Based on the Wall and Set-Out
Tile size changes the number of grout joints, the position of cuts and how the wall aligns with bathroom fittings. Measure the complete wall before deciding. Include niches, windows, corners, taps, shower outlets, screens, baths, vanities and the finished ceiling height.
Large bathroom wall tiles can create broader uninterrupted surfaces with fewer grout joints. However, fewer joints do not guarantee a cleaner-looking result. A large tile may create narrow cuts around a niche, leave an awkward strip near the ceiling or be too heavy for the proposed wall system.
Small bathroom wall tiles offer more flexibility around detailed areas and changes in direction. Mosaics and compact formats can work well inside niches or across curved surfaces. The trade-off is a higher grout-joint count, more installation work and potentially more cleaning.
Before ordering, ask your tiler to prepare a set-out for the main walls. The plan should consider:
- where full tiles will begin and finish
- how joints align with the vanity, bath and shower screen
- the position of niches, mixers and shower outlets
- internal and external corners
- the width of cuts at floor, ceiling and wall edges
- the tile thickness and edge trims
- the selected grout-joint width
I would rather see a slightly smaller tile with balanced cuts than a large tile forced into a wall that does not suit its dimensions. The tile should work with the room’s measurements, not against them.
The size also affects weight and installation. Large-format bathroom wall tiles may require a flatter substrate, different handling and a fixing system suited to their dimensions and weight. Your tiler should confirm those requirements before you place the order.
Our Tile Size Guide explains how dimensions and room proportions affect tile selection across the home. For a bathroom-specific comparison, see how large and small bathroom tiles perform in different spaces.
Choose the format after checking the set-out. That practical step tells you far more than a general rule about which tile size makes a bathroom look larger.
7. Use Layout Patterns Without Overcomplicating the Room
The layout changes how bathroom wall tiles meet corners, fittings, niches and adjoining surfaces. It also affects the number of cuts, installation time and tile waste. Choose the pattern with the wall dimensions in mind rather than relying on appearance alone.
- Stacked layout. Tiles line up in straight horizontal and vertical rows. This can create a clean grid, but the joints need to align carefully around the vanity, shower screen and other fixed elements.
- Running bond. Each row is offset from the one below it. This familiar layout works with many rectangular tiles, although the permitted offset may depend on the tile’s size and dimensional characteristics. Ask your tiler to confirm the appropriate set-out.
- Vertical layout. Rectangular tiles are installed with their longest edge running upwards. A vertical bathroom wall tile layout can add a different proportion to the wall, but it does not automatically make every bathroom look taller. The result depends on tile size, grout colour, ceiling height and where the pattern finishes.
- Herringbone and diagonal layouts. These patterns introduce more movement and can work well on a selected wall or smaller area. They usually create more perimeter cuts and may require additional tiles and installation time. Plan the set-out before ordering so the pattern remains balanced around corners and fittings.
Mixing layouts can work when there is a clear reason for the change. For example, you might use a simple stacked layout across the main walls and a different arrangement inside a niche. Repeating several patterns across multiple walls can make the room feel busy and complicate the installation.
I recommend asking your tiler for a sketch or dry set-out when the pattern includes offsets, angles or detailed cuts. Check where the layout begins, where it finishes and how it meets the floor tile. A strong pattern cannot correct an awkward strip at the ceiling or an unbalanced cut beside the vanity.
If you are considering a rectangular tile, our guide to subway tile patterns compares offset, stacked, vertical, herringbone, diagonal, crosshatch, stepladder and chevron layouts. Whatever pattern you choose, keep the layout secondary to a well-planned set-out.
8. Decide Whether to Tile Every Bathroom Wall
You do not need to tile every bathroom wall from floor to ceiling. The right extent depends on water exposure, cleaning, budget and the finish you want. Waterproofing requirements must still be met in shower areas and other regulated wet zones, regardless of the decorative tiling plan.
Full-Height Wall Tiling
Floor-to-ceiling bathroom wall tiles can create a continuous finish and remove painted sections from the main walls. This approach may suit bathrooms where easy wiping and visual consistency are priorities.
The trade-off is more tile, adhesive, grout and installation work. Full-height tiling can also create additional cuts around windows, doors, cabinetry and the ceiling. Include those details when comparing quotes rather than looking at the tile price alone.
Partial-Height Wall Tiling
Partial tiling can reduce the quantity of tiles required and introduce a painted finish above the tiled section. A half tiled bathroom wall may work well outside direct wet areas, particularly around a vanity, toilet or freestanding bath.
The transition needs proper planning. Decide where the tile will finish, how the top edge will be detailed and whether that line aligns with the vanity, mirror, window or another feature. The paint above must also suit a humid bathroom.
Partial tiling does not mean you can shorten the tiled or waterproofed area inside a shower without checking the applicable requirements. Your installer must confirm the correct treatment for each wall before work begins.
Compare the Complete Cost
I recommend pricing the whole wall treatment, not just the square-metre cost of the tile. Edge trims, additional cuts, wall preparation, grout and labour can change the difference between partial and full-height tiling.
A more affordable tile used across a larger area may cost less overall than a premium tile with complicated borders and detailed cuts.
Choose the tiling height after marking it on the wall. Seeing the proposed line beside the vanity, mirror and shower screen will help you judge whether the transition feels deliberate.
9. Coordinate Bathroom Wall and Floor Tiles
Bathroom wall and floor tiles do not need to match exactly, but they should look intentional together. Start with product suitability, then compare colour, undertone, finish, pattern, scale and grout.
I usually confirm the floor tile first because it has performance requirements that do not apply to walls. Once the floor is suitable for the bathroom application, you can choose bathroom wall tiles that match it, contrast with it or repeat one of its colours.
Using the Same Tile on Walls and Floors
The same tile can create a continuous finish across both surfaces, but only when the exact product is approved for wall and floor use. Never install a wall-only tile on the floor because it looks similar to a floor-rated product.
A matt or structured finish does not confirm complete floor suitability. Check the product’s intended use and relevant slip classification for the specific bathroom area. Our guide to tile ratings and grades explains the different rating systems and what they mean.
Using the same design does not always require the same finish. Some tile ranges include visually coordinated wall and floor options with surfaces suited to their separate applications.
Pairing Different Wall and Floor Tiles
Contrasting tiles can work just as well as matching tiles. A darker floor can anchor lighter walls, while a patterned floor can be balanced with quieter wall tiles. You might also repeat a colour or undertone across both surfaces without using the same tile.
Watch the amount of variation already present. Strong movement on the floor, contrasting grout and a patterned wall can compete when used together. Decide which surface will carry the most detail, then let the other support it.
Plan Grout Joints and Transitions
Tile dimensions affect whether wall and floor joints can align. If alignment is important, ask your tiler to check the combined set-out before ordering. Different tile sizes and required grout-joint widths may make exact alignment impractical.
Grout colours can match across both surfaces or respond separately to each tile. The wall and floor joints do not need to have the same width if the products and installation requirements differ.
Our guide to matching tiles in the bathroom provides more examples of coordinating colour, pattern and finish. The goal is not a perfect match. It is a combination where each tile suits its application and the finished surfaces read as one planned scheme.
10. Add a Feature Wall Without Losing Balance
A feature wall can introduce colour, pattern or texture without applying it across the entire bathroom. The key is choosing one surface with a clear purpose and allowing the surrounding bathroom wall tiles to support it.
Common positions include the wall behind a vanity, the end wall of a shower or the first uninterrupted wall seen from the doorway. The best position depends on the room’s layout. A feature tile will lose impact if it is broken up by several fittings, a large mirror or awkward cuts.
Bathroom feature wall tiles should connect with the rest of the scheme. You might repeat a colour from the floor tile, choose a related undertone or use a textured version of the main wall colour. The tiles do not need to match, but they should share something that makes the combination feel planned.
I generally recommend letting one surface carry the strongest detail. A patterned floor, contrasting grout, decorative wall tile and statement vanity can all compete when used together. Decide where you want the eye to settle, then keep the other elements quieter.
Practicality still matters. A deeply textured feature tile may require more cleaning inside a shower or behind a basin. Mosaics introduce more grout joints, while strong patterns need careful set-out around niches, tapware and corners. Confirm the exact tile is suitable for the proposed position before choosing it for appearance.
Our complete Feature Tiles guide explains how to choose, place and coordinate feature tiles across bathrooms and other rooms. For this bathroom wall guide, the main decision is whether the feature improves the overall scheme or adds another competing element.
11. Choose Bathroom Wall Tiles That Are Practical to Clean
The easiest bathroom wall tiles to maintain usually have a smooth surface, manageable grout-joint count and care requirements that suit the household. Material alone does not settle the question. A smooth ceramic tile may be easier to wipe than a heavily textured porcelain tile.
Soap residue, cosmetics, mineral deposits and cleaning products affect different parts of the bathroom. Tiles inside a shower usually need more frequent attention than walls outside direct splash zones. Look closely at the actual surface and think about what may collect in grooves, ripples or raised details.
Consider these practical points before choosing:
- Surface texture: Smooth glazed tiles are generally easier to wipe. Deep texture can hold residue and may require a brush or more detailed cleaning.
- Grout joints: Smaller tiles and mosaics create more joints. The tile faces may be easy to clean, but the extra grout can add maintenance.
- Colour and pattern: A colour may disguise some marks without making the surface cleaner. Dark gloss tiles can show dried water spots, while heavily patterned tiles may make residue less obvious between cleans.
- Wall position: Texture may be manageable on a wall outside the shower but less practical behind a basin or in a direct spray zone.
- Care instructions: Check the recommendations for the exact tile and grout. Do not assume that a strong or abrasive cleaner is suitable for every finish.
I ask customers to think about the cleaning they will actually do, not the routine they hope to follow after the renovation. If a low-maintenance bathroom is the priority, simpler surfaces and fewer grout joints are usually the safer choice, and some Perth homeowners take that thinking further by weighing up wet wall panels vs tiles before committing to a tiled wall at all.
Homes affected by hard water may see mineral marks build up more quickly on shower surfaces. Regular wiping can help, but the visibility of those marks will still vary with the tile colour and finish.
Our Tile Cleaning and Maintenance Guide explains how to care for different tile surfaces and grout. Choose a finish you are comfortable maintaining, then follow the product and grout care instructions after installation.
12. Plan Grout Colour and Joint Width Properly

Grout affects the appearance, cleaning and installation of bathroom wall tiles. Colour is largely a design decision, but joint width is not. The tile, edge type, dimensional variation and installation requirements all influence how wide the joints need to be.
Choose Whether to Blend or Contrast
A grout colour close to the tile can soften the joint pattern and create a more continuous surface. Contrasting grout makes each tile and layout more visible. This can work well with a simple stacked or offset pattern, but it will also highlight any changes in alignment.
I ask customers whether they want to notice the tile first or the grid around it. That usually makes the grout-colour decision easier. A patterned or strongly varied tile may need a quieter grout, while a plain tile can handle more contrast if the layout is meant to be prominent.
Dark grout may make some discolouration less obvious, but it still needs regular cleaning. It can also show soap residue or pale mineral deposits. Light grout creates a softer effect with many pale tiles, although marks may become more visible between cleans.
Test the tile and grout together where possible. Our guide to choosing the right grout colour compares tonal and contrasting combinations in more detail.
Confirm the Required Joint Width
Do not select grout-joint width by appearance alone. Pressed tiles can have greater dimensional variation, while rectified tiles have mechanically finished edges and more consistent dimensions. Neither type should be installed without grout.
The final joint width must suit:
- the tile’s edge type and dimensional variation
- the tile size and format
- the substrate and wall condition
- the chosen layout
- movement and installation requirements
- the tile and grout manufacturer instructions
Our guide to pressed and rectified tile edges explains why the two edge types may require different set-out and grout considerations.
Wall and floor grout joints do not always need to be the same width. If you want the joints to align across both surfaces, ask your tiler to check the tile dimensions and complete set-out before ordering. Your installer should also confirm the grout product and joint specification for the bathroom application.
Final Bathroom Wall-Tile Checklist
Before ordering bathroom wall tiles, run through these final checks. They will help you compare suitable options and give your tiler the information needed to confirm the installation.
- Application: Record the exact wall position and whether it is inside a shower, behind a bath, beside a vanity or outside direct splash areas.
- Product suitability: Confirm that the exact tile is approved for its proposed wall and wet-area application.
- Material and finish: Compare ceramic, porcelain and decorative options by weight, surface, cleaning needs and appearance.
- Colour and lighting: View samples upright under the bathroom’s natural and artificial light. Compare them beside the floor tile, vanity finish and tapware.
- Size and set-out: Measure walls, niches, corners, fittings, windows and ceiling height. Ask your tiler to identify narrow cuts or awkward pattern breaks.
- Wall system: Confirm that the substrate, tile weight, adhesive and fixing method work together.
- Wall and floor coordination: Check each product separately. Never use a wall-only tile on the floor, even when the designs look similar.
- Cleaning and grout: Consider surface texture, grout-joint count, grout colour and the care instructions for the selected products.
- Waterproofing: Make sure the responsible installer confirms the required waterproofing system before tiling begins. Tiles and grout do not replace it.
- Ordering quantity: Finalise the layout before calculating quantities. Include the allowance recommended for cuts, breakage, pattern matching and future repairs rather than applying an arbitrary figure.
Bring your room measurements, photos and tile samples together before making the final decision. It is much easier to identify a problem on paper than after the tiles have arrived.
Frequently Asked Questions About Bathroom Wall Tiles
These answers cover the suitability, material, finish, size and waterproofing questions homeowners often ask before ordering tiles for bathroom walls.
Which Bathroom Wall Tiles Should You Choose?
The right bathroom wall tiles suit the exact wall, water exposure and installation system. Once those requirements are clear, compare material, finish, colour, size, layout, cleaning and grout.
Start by removing any tile that is unsuitable for the proposed application. Then view the remaining options beside the floor tile, vanity, tapware and other finishes. This approach keeps the practical decisions in control without losing sight of the bathroom you want to create.
You can compare our dedicated range of wall tiles online or view samples in our Guildford showroom. The range includes options for bathroom walls, shower walls, splashbacks and feature applications, subject to the individual product specifications.
If your project also includes bathroom floors, feature tiles or adjoining areas, browse our full tile range to coordinate the complete scheme. Bring your measurements, room photos and planned finishes into the showroom so we can help you compare suitable formats, surfaces and colours.
We can help with product information, quantities, grout and compatible tile supplies. Your tiler or responsible installer must still confirm the substrate, tile weight, adhesive, waterproofing and complete installation specification before you order.
Choose by application first, then let colour and design settle the final decision. That order gives you bathroom wall tiles that look right and suit the wall behind them.
