
How to Choose Bathroom Floor Tiles: 10 Practical Steps
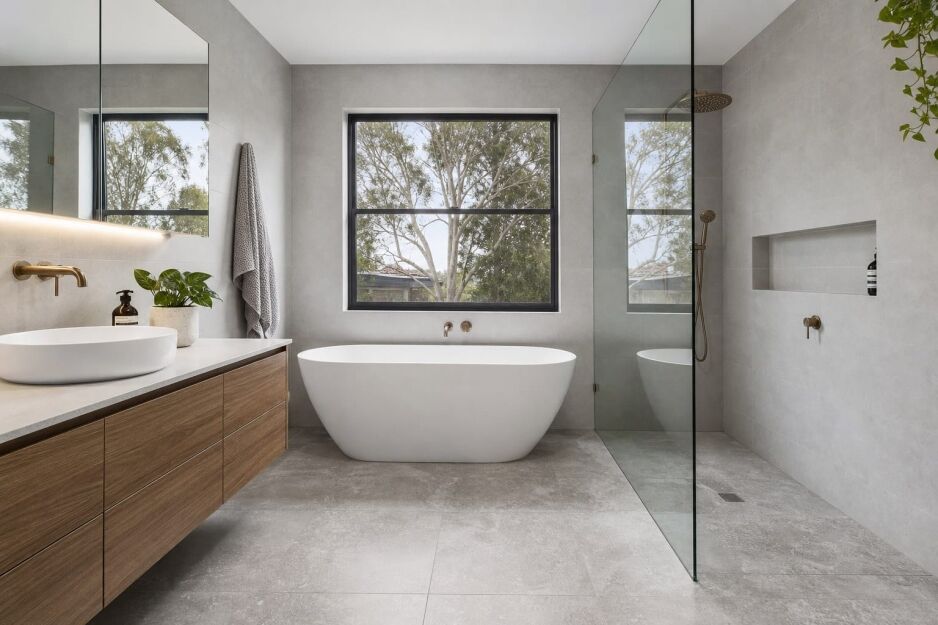
Three tiles can look equally suitable on a showroom display. But knowing how to choose bathroom floor tiles means checking where each one can be used and how its finish performs. The size must also work with the floor plan before colour or pattern gets the final say.
When customers are choosing bathroom floor tiles, I often see a shortlist narrow from three favourites to one. That usually happens once we discuss floor-use suitability, the intended wet-area application and the proposed set-out. This guide takes Perth renovators through that decision in ten practical steps. We will cover intended use, materials, size, finish, colour, grout and quantity.
Below, we focus on the main bathroom floor. Shower floors and detailed slip decisions need their own checks. If you are still planning every tiled surface, start with our broader guide to choosing tiles for the whole bathroom. First, though, let’s establish what makes a bathroom floor tile a sound choice.
Quick Answer: What Type of Tile Is Best for a Bathroom Floor?
The best tiles for a bathroom floor are individual products confirmed as suitable for floors and the intended wet-area application. When deciding how to choose bathroom floor tiles, compare the product’s surface performance, size, set-out and cleaning requirements. Suitable porcelain and ceramic tiles can both work.
If you are asking what type of tile is best for a bathroom floor, the answer can change with the bathroom zone. A powder room, family bathroom and shower area face different moisture, traffic and layout demands. Confirm the tile’s stated application with the supplier, then have the tiler check the proposed set-out before ordering. The first practical step is separating the main bathroom floor from the shower floor.
Step 1: Separate the Main Bathroom Floor From the Shower Floor

The main bathroom floor and shower floor do not automatically need the same tile. I usually ask where the tile is going before I ask what colour the customer likes. That answer tells me whether we are discussing a powder room, family bathroom, main bathroom floor or shower base, because each zone has different water exposure and set-out demands.
The shower area may need a different tile size, surface performance and drain set-out from the rest of the room. Our guide to choosing tiles for a shower floor covers those shower-specific checks, including how the floor waste and required falls affect the layout. Here, we will keep our attention on the main bathroom floor rather than repeat that advice.
Once the bathroom zones are clear, you can check whether each shortlisted tile is approved for the job.
Step 2: Confirm the Tile Is Suitable for the Intended Floor
Every tile on your shortlist needs confirmation that it is suitable for floor use and the intended wet-area application. Of everything involved in how to choose bathroom floor tiles, this is the check I would not skip.
A tile sold for walls cannot be assumed to work on a bathroom floor. A floor tile can sometimes go on walls, but the reverse is not automatic. A glaze does not determine floor-use suitability either.
Check the product page, carton details or manufacturer product information for the stated applications, and ask us if anything is unclear. We are a retailer rather than the manufacturer, so what we can pass on depends on the supplier. Ceramic, porcelain, matt and textured describe a tile, not the job it can do.
Four things to confirm on every shortlisted product:
- Application: The surfaces and rooms the product is made for.
- Floor use: A clear indication that the tile is intended for residential floors.
- Wet-area suitability: Confirmation it suits a bathroom, not a dry interior floor.
- Technical information: The wear and slip data your supplier can provide for that product.
Once the shortlist is confirmed as fit for the job, compare the two materials most buyers weigh up.
Step 3: Compare Ceramic and Porcelain Bathroom Floor Tiles
The two types of bathroom floor tiles most buyers shortlist are ceramic and porcelain. Both are fired clay products, and both can be made for walls, floors or both. The differences that matter show up in the tile body, the formats available and what each individual product is approved to do.
| Consideration | Suitable ceramic floor tile | Suitable porcelain floor tile | What to verify |
| Tile-body water absorption | Generally higher | Generally lower | The absorption figure or category stated for the product |
| Typical density | Usually a softer body | Usually a denser body | That the product is rated for a residential bathroom floor |
| Cutting and drilling | Often easier to cut | Can be harder and may need better blades | Your tiler’s preference, plus any tricky cuts or penetrations |
| Formats available | Good range in common sizes | Wider range, including large formats and rectified edges | That the size and edge type you want exists in that material |
| Colour and pattern | Pattern is carried in the glaze | Glazed porcelain also carries pattern in the glaze. Through-body porcelain runs colour through the body | Whether the product is glazed or through-body, if chip visibility concerns you |
| Common applications | Walls and residential floors where approved | Walls, residential floors and some heavier-traffic areas | The stated application for that exact product |
Porcelain tiles for bathroom floors generally have lower tile-body water absorption, though that does not make every porcelain tile right for every bathroom floor. I have sold ceramic tiles for bathroom floors for decades, and the suitable ones do a perfectly good job in a normal family bathroom. Our porcelain versus ceramic tiles guide covers the full comparison if you want more detail than the table above.
My advice is to shortlist the products already confirmed as suitable for your floor, then compare material characteristics, style, format and what the project needs. Settling the ceramic or porcelain tile for bathroom floor question before that step tends to cut good options out of the running for no real reason.
Material narrows the shortlist. It does not tell you how the surface performs underfoot.
Step 4: Check Slip Performance Separately From Wear Resistance
PEI abrasion classification does not measure wet slip resistance. These are two separate pieces of information about a tile, and treating them as one leads people to a floor that wears well but feels wrong underfoot.
PEI is a wear-resistance classification applied to applicable glazed tiles. It indicates how the glazed surface is expected to handle foot traffic and abrasion over time. It tells you nothing about grip.
Slip performance comes from separate slip-test information. Where the supplier provides it, that includes a P rating produced under AS 4586:2013. A higher wear class does not mean more wet grip, so a tile rated for heavy traffic can still be the wrong surface beside a shower.
The right surface depends on the exact product, the bathroom zone and the household using the room. A powder room used by adults is a different problem from a family bathroom shared with young children or an ageing parent. Our non-slip bathroom floor tile guide covers P ratings, finish comparisons and zone-by-zone selection properly.
With the surface information sorted, check that the tile format can physically work with the room.
Step 5: Choose a Tile Size That Works With the Floor Plan
The best size is the format that works with your bathroom dimensions, floor plan, waste position and intended layout. Part of how to choose bathroom floor tiles is accepting that the room decides this, not a rule about small rooms needing small tiles.
Large bathroom floor tiles can work well in a smaller bathroom. A 600 x 600 mm format keeps the grid quiet and reduces the number of grout joints. It can also leave awkward slivers around the perimeter, or fight the drainage geometry near the floor waste. Common bathroom floor tile sizes in our range include 300 x 300, 300 x 600 and 600 x 600 mm, and none of them is the standard choice.
Get your tiler to look at the floor before the order is finalised. They need to assess the floor wastes, the required falls, the substrate condition, the threshold heights and where the fixtures land. Under the NCC wet-area waterproofing provisions, a floor with a floor waste needs appropriate falls to drainage, and a larger rigid format has less room to absorb that shaping. Our tile size guide has more on format and visual proportion.
With the format working on plan, compare finishes for daily use and cleaning.
Step 6: Select a Finish You Can Live With
Choose a floor-suitable finish that works for the zone it is going into and for how much cleaning your household will actually do. Bathroom floor tile finishes range from smooth matt through to lightly structured and more heavily textured surfaces, and each one behaves differently once the room is in daily use.
A smooth matt finish wipes down quickly and suits people who want the floor cleaned in one pass. It will show water marks and footprints more readily, particularly in a dark colour. Polished and glossy-looking surfaces need careful assessment at product level before they go anywhere near a bathroom floor. More texture helps disguise marks between cleans, though the surface holds soap residue and needs proper attention when you do clean it.
Neither matt nor textured is a safety label. A matt tile is not automatically non-slip, and a textured one is not automatically safe. That information comes from the product’s slip data, not the finish name.
Running your hand across a sample in our showroom also proves very little. A dry palm on a dry tile tells you nothing about how the surface behaves wet and underfoot.
With the functional shortlist settled, you can move into colour and pattern.
Step 7: Choose the Floor Colour and Pattern
Bathroom floor tile colours change the visual weight of the room rather than its actual size. A light floor bounces available light around and keeps the space feeling open. A mid-tone or dark floor anchors the room and gives wall tiles, cabinetry and tapware something solid to sit against. Both approaches work, and neither one makes a small bathroom bigger on its own.
Think about what the floor will show. Light floors hide dust and hair less well than people expect, while dark floors reveal soap residue and water marks quickly. A tile with genuine tonal variation across the batch disguises both better than a flat, even colour. Test your shortlist under the natural light the room actually gets, then again under the artificial lighting you plan to install. A bathroom with one small window behaves nothing like a north-facing one.
Patterned bathroom floor tiles work when the rest of the room steps back and lets the floor be the feature. Geometric, encaustic-look, stone-look and restrained monochrome designs all do this well. Pattern scale matters as much as the pattern itself, since a busy small-scale design across a large floor reads very differently to the same design in a powder room. Grout contrast pushes the effect either way.
A bathroom floor tile design also has to sit comfortably beside the flooring in the rest of the house. Our guide to choosing the right floor-tile colour looks closer at tone and coordination room by room.
A floor can work on its own and still clash with the wall tiles, vanity or tapware, so test the room as one palette.
Step 8: Coordinate the Floor With the Rest of the Bathroom
Compare the floor against everything else going into the room before you commit to it. That means the wall tiles, the vanity cabinetry, the benchtop, the tapware, the shower screen frame and the lighting. A floor that looks right on its own can still throw the whole palette out once the other finishes arrive.
The approach I recommend is one dominant surface, one supporting surface and an optional feature used sparingly. That usually means the floor or the wall tile leads and the other steps back. Forcing a fixed three-tile rule onto every bathroom tends to produce a busy room, so let the space and the fixtures decide. Our guide to bathroom colour schemes for Australian homes has palette examples if you want a starting point.
The floor and wall tile can be the same product, provided that exact tile is approved for both applications. Running one tile across both surfaces creates continuity and works well in smaller bathrooms. A wall-only tile cannot be moved onto the floor, though, no matter how well it suits the room. Our guide to choosing bathroom wall tiles covers vertical-surface selection in detail.
Get full samples of everything and view them together, in the room, under daylight and again under the bathroom lighting you plan to install. Small chips and screen images will mislead you on tone.
Once the palette works, grout, edges and the doorway transition determine whether the floor looks properly resolved.
Step 9: Plan the Grout, Tile Edges and Transitions
Grout and edge type change how the format and pattern read once the floor is down. The same tile can look like a quiet, continuous surface or a defined grid, and the grout colour decides which one you get.
Matching grout softens the grid and lets a large format read as one plane. Contrasting grout does the opposite, emphasising tile shape and drawing the eye to the alignment. That suits geometric and encaustic-look patterns, though it also exposes any inconsistency in the set-out. Our guide to choosing a grout colour works through the options properly.
Tile edges matter here too. Pressed tiles have a slightly softened, less uniform edge from the firing process. Rectified tiles are cut square after firing, giving a more precise edge. Joint widths and movement joint requirements are the installer’s call for the product and the project, and AS 3958:2023 is the current installation reference they will work from.
Look at the edges of the floor as well as the middle. Doorway transitions, thresholds, the vanity edge and the change between bathroom and adjacent flooring all need a plan. Sorting these before the tiler starts avoids a compromise decided on the day.
With every selection resolved, test the set-out and quantity before you place the order.
Step 10: Test the Set-Out Before You Order
Get full samples before you order anything. Take them into the bathroom, put them on the floor, and look at them at the times of day you actually use the room. The best floor tiles for a bathroom are the ones that still work after that test, not the ones that looked right under showroom lighting.
From there the sequence is easy to follow. Prepare a preliminary set-out and measure each tiled area separately. You can calculate your tile quantities using the measured area, wastage allowance and box coverage, then confirm the final order against your chosen layout. Your allowance needs to cover cuts, breakage, pattern direction and a few spares for future repairs.
Most bathrooms need somewhere between 10% and 15% on top of the measured area. Our online tile listings include a 10% waste option, which covers a simple rectangular room laid straight. Move closer to 15% for a patterned or diagonal layout, large formats, or a floor with a lot of cuts around a central waste. Get your tiler to confirm the quantity before you order, particularly with multiple tile types or an awkward waste position.
Order the confirmed quantity in one go. Tiles are produced in batches and shade can shift between them, so a small top-up order weeks later may not match what is already on the floor. Keep the leftovers somewhere dry and labelled.
One safety note before you start pulling up an old bathroom floor. Plenty of Perth homes built before 1990 contain asbestos in wet-area sheeting, flooring and backing materials. If your home predates 1990, do not disturb anything suspect until it has been assessed by someone competent. WorkSafe WA advice for homeowners and renovators sets out what to do.
You now have everything needed for the final pre-purchase check.
Bathroom Floor Tile Selection Checklist
That covers the ten steps, so here is the short version to take into the showroom with you. Run your shortlist against it before you commit to anything, and it will turn a folder of bathroom floor tile ideas into a decision you can actually order from. The whole point of how to choose bathroom floor tiles well is catching the practical problems while changing your mind is still free.
- Confirm which zone the tile is for, because the main floor and the shower floor are separate decisions
- Check the individual product is approved for floor use and for a wet area, not just the room
- Ask what slip-test information the supplier holds for that exact product
- Compare suitable ceramic and porcelain options on their stated characteristics, not on material reputation
- Test the format against the room dimensions, floor waste position and required falls
- Choose a finish that suits both the zone and how much cleaning the household will do
- View full samples together, in the room, under daylight and your planned bathroom lighting
- Confirm the final quantity with your tiler and keep spare tiles from the same batch
Anything on that list you cannot answer yet should be settled before the order goes in, not after.
That leaves the questions that come up most often here at Ross’s.
Bathroom Floor Tile FAQs
Most of these come up while people are still comparing samples, so the answers below stay short and practical.
Which Bathroom Floor Tile Should You Choose?
Work through it in order. Define the zone, confirm the tile is approved for that floor, compare the material and surface information, test the format against your set-out, then coordinate the design with the rest of the room. That sequence is really all there is to how to choose bathroom floor tiles. The right answer is the tile that passes every practical check and still looks right in the room.
I would rather spend a few extra minutes with someone over a floor plan and a full sample than help sort out awkward cuts or a short order later. The checking costs nothing at this stage.
Bring your plans, measurements and finish samples into Ross’s Discount Home Centre, and we will go through our bathroom tile range with you.
