
Shower Head Replacement Perth: Best Options & How to Install
Shower head replacement is the fastest, most affordable bathroom upgrade you can make. Better water pressure, modern style, improved functionality—all achievable in 15-30 minutes without calling a plumber.
I see this transformation constantly at Ross’s: Perth homeowners choose replacement shower heads to update outdated fixtures, upgrade to rainfall-style showers, or fix reduced pressure from mineral buildup. It’s a small change that makes an immediate difference to your daily routine.
This guide covers our top recommended replacement shower heads for Perth bathrooms, plus step-by-step DIY installation instructions. Most homeowners can complete this shower head replacement upgrade in 15-30 minutes with basic tools. Let me show you exactly what works and how to install it properly.
When to Replace Your Shower Head
Not every shower head issue requires replacement, but certain signs indicate it’s time for an upgrade rather than a repair.
Visible Mineral Buildup or Corrosion
Perth’s water causes mineral deposits that clog spray nozzles over time. If you see white, crusty buildup that won’t clean off, or rust and corrosion around connections, your shower head’s reached the end of its useful life. A replaceable shower head solves this problem immediately and often improves water pressure dramatically.
Reduced Water Pressure
Weak, uneven spray usually means internal clogging from mineral buildup. While you can sometimes clean aerator screens, severely reduced pressure typically requires replacing the entire unit. Modern shower heads maintain better flow even with Perth’s hard water.
Leaking Connections
Drips from where the shower head connects to the arm waste water and can damage your bathroom over time. If tightening the connection or replacing plumber’s tape doesn’t fix the leak, the threads are likely worn and you need a new shower head.
Outdated Style Doesn’t Match Your Renovated Bathroom
You’ve updated your bathroom tapware, tiles, and accessories—but your old chrome shower head doesn’t coordinate. Shower head replacement offers an affordable way to complete your bathroom renovation without major plumbing work. Match finishes to your new tapware for cohesive design.
Upgrading to Water-Efficient Models
Older shower heads use significantly more water than modern 3-star WELS rating models. Water-efficient shower heads reduce consumption without compromising pressure, lowering both water and heating costs for Perth households.
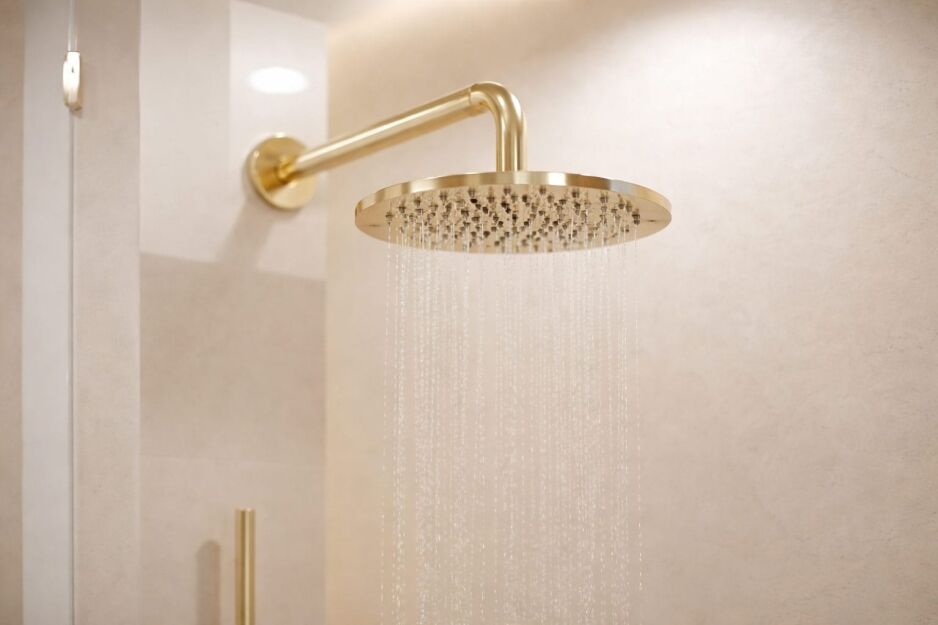
Switching from Basic to Rainfall or Overhead Styles
If you’re ready to upgrade from a standard shower head to rainfall or overhead coverage, separate shower arm and rose combinations deliver that luxury shower experience. The installation process is straightforward, and the improvement to your daily routine is immediate.
Best Replacement Shower Heads at Ross’s
At Ross’s, we carry everything from budget-friendly all-in-one shower heads to premium shower arms and shower roses that offer more customisation. Here are my top recommendations based on what actually sells well and what Perth homeowners tell me works best in their bathrooms.
Best Budget Option

Universal All Directional Shower Head – $35
This is Ross’s #1 selling shower head, and for good reason—affordability meets genuine functionality.
The Universal All Directional offers easy DIY installation that’s perfect for first-timers. It’s an all-in-one design, so you’re not dealing with separate components or complicated assembly. Just unscrew your old shower head and screw this one on. The adjustable spray patterns let you switch between focused and wide coverage depending on what you need.
The chrome finish suits most bathroom styles and coordinates easily with existing tapware. It carries a 3-star WELS water efficiency rating, so you’re saving water without sacrificing pressure.
This replacement shower head works ideal for rental properties where you need functional upgrades without major investment, budget renovations where every dollar counts, or quick bathroom refreshes that make an immediate difference. At $35, it’s the most accessible entry point to better shower performance.
Best Modern Premium Option
Cube Hi-Rise Shower Arm ($120) + Cube ABS Shower Head ($100) – Total $220
If you’re after a modern, contemporary design with overhead rainfall experience, the Cube system delivers excellent value at the premium end of our range.
This is sold as separate components—you purchase the shower arm and shower rose individually, which gives you flexibility in coordinating finishes. The square, cube aesthetic suits modern Perth bathrooms beautifully, particularly those with angular tapware and minimalist design.
The hi-rise arm provides that overhead shower coverage families particularly appreciate. The durable ABS construction handles daily use well, and we stock multiple finishes: Chrome, Matte Black, and Brushed Gold. All options carry the 3-star WELS rating for water efficiency.
Installation requires fitting both the arm and rose, which takes slightly longer than all-in-one units but isn’t difficult for anyone comfortable with basic DIY. This combination works ideal for complete bathroom renovations where you’re upgrading multiple fixtures, modern aesthetic bathrooms, and families wanting proper overhead coverage rather than standard side-mount spray.
Best Affordable Modern Option
Rectangular Black All Directional Shower Head – $110
The Rectangular Black hits that sweet spot between modern design and accessible pricing.
This features a modern rectangular design with matte black finish—easily the most popular finish in Perth renovations over the past few years. It’s an all-in-one complete unit, so installation stays simple while the aesthetic delivers contemporary impact.
The directional spray adjustment lets you angle coverage where you need it, and the rectangular shape creates visual interest compared to standard round heads. At $110, it’s well-priced for the modern aesthetic it provides.
The matte black finish coordinates beautifully with black tapware and bathroom accessories, which matters if you’re creating a cohesive look throughout your bathroom. It carries the 3-star WELS rating standard across our range.
This works ideal for modern bathroom refreshes where you’re updating fixtures without complete renovation, coordinating with black bathroom fixtures, and mid-range budgets that want contemporary style without premium pricing.
Complete vs Separate: Understanding Your Options
All-in-one shower heads like the Universal and Rectangular Black are complete units with their own integrated arm that offer direct replacement for your existing shower head. They screw directly into your wall fitting as a single piece. Installation is straightforward: remove your old shower head (which unscrews as one unit from the wall), then screw the new all-in-one unit straight into the wall fitting.
Separate arm and rose combinations like the Cube system require joining the shower arm and shower rose together first to form the complete unit, then installing that assembled unit into the wall fitting.
The installation process is essentially the same for both—they’re both direct replacement options that screw into the same wall fitting. The only difference is that separate systems require connecting the arm to the rose before installation, while all-in-one units come already assembled as a single piece.
Separate systems offer more customisation in finish coordination and the ability to upgrade just the arm or just the rose separately in future. For shower head replacement on a tight budget, all-in-one units deliver excellent value and slightly faster installation (no pre-assembly needed). When you’re ready to change shower head style completely or want that premium overhead experience, separate systems justify the additional investment and extra assembly step.
How to Replace a Shower Head Yourself

Most Perth homeowners can replace a shower head themselves in 15-30 minutes. Here’s a no-fuss step-by-step guide to replacing a shower head.
Tools & Materials Needed
You’ll need basic tools most households already have:
- Adjustable spanner or pipe wrench
- Plumber’s tape (Teflon tape)
- Clean cloth or rag
- Optional: WD40 penetrating oil (for stuck connections)
- Your new replacement shower head (all-in-one unit) OR new shower arm and rose combination
Step-by-Step Shower Head Installation Process
This process works for replacing all-in-one shower heads and separate arm and rose systems—the installation to your wall fitting is identical for both types.
Step 1: Turn Off Water Supply
Turn off the mains water connection before starting. This prevents water spray when you remove the old unit and protects against accidental pressure surges during installation.
Step 2: Remove Old Shower Head
Unscrew the entire unit from your wall fitting by turning counterclockwise. Try by hand first—many units come off easily. If it’s stuck, wrap a cloth around the connection to protect the finish, then use your spanner for leverage.
If the connection won’t budge, apply penetrating oil around the threads, wait 10 minutes, then try again. Don’t force it—you’ll damage the wall fitting threads, which creates bigger problems.
Step 3: Clean the Wall Fitting Threads
Remove all old plumber’s tape and debris from the wall fitting threads. Wipe the threads clean with your cloth and check for damage or corrosion. If the wall fitting threads are damaged or corroded, you’ll need a plumber to replace the fitting itself before installing your new shower head.
Step 4: Prepare Your New Shower Head
This is where all-in-one units and separate systems differ:
For all-in-one units (Universal, Rectangular Black): Your shower head is ready to install as-is. No assembly required.
For separate arm and rose systems (Cube combination): You need to connect the shower rose to the shower arm first to create your complete unit:
- Apply fresh plumber’s tape to the shower arm’s threaded end (where the rose attaches)
- Screw the rose onto the arm hand-tight
- Align the spray angle how you want it
- Use your spanner for a final quarter turn (don’t overtighten)
- This creates your assembled unit ready for wall installation
Step 5: Apply Fresh Plumber’s Tape to Wall Connection
Remove any remaining old plumber’s tape from the wall fitting threads. Wrap new tape clockwise around the threads (in the direction of installation)—3 to 4 wraps is sufficient. Press the tape firmly into the threads as you wrap. This creates the watertight seal that prevents leaks.
Step 6: Install New Shower Head Unit
Screw your complete unit (either all-in-one or pre-assembled arm and rose) into the wall fitting. Start hand-tight, turning clockwise. Align the shower head to your desired angle and height before final tightening.
Use your spanner for a final quarter turn to secure the connection—don’t overtighten as this can damage threads or crack fittings. Wrap your cloth around the connection to protect the finish from spanner marks.
Step 7: Test for Leaks
Turn the mains water back on slowly. Check the wall connection point carefully for any drips. For separate systems, also check where the shower rose connects to the shower arm—you have dual connections that both need checking.
Minor weeping is normal at first as the plumber’s tape compresses. If dripping continues after a minute, turn the water off and tighten the connection slightly. Test again.
Common Problems & Solutions
- Problem 1: Stuck Shower Head Won’t Budge: Apply penetrating oil around the connection, wait 15 minutes, then try again with your spanner and cloth. If it still won’t move after multiple attempts, the threads may be corroded together—time to call a plumber.
- Problem 2: Leaking After Installation: Add more plumber’s tape to the connection, ensuring you wrap it clockwise. Remove the unit, check that you haven’t cross-threaded the connection (threads should align smoothly), reapply tape, and reinstall.
- Problem 3: Shower Head Sprays at Wrong Angle: Loosen the connection slightly, realign to your desired angle, then retighten. Some models have swivel ball joints that allow angle adjustment without loosening the wall connection.
- Problem 4: Low Water Pressure After Installation: Check if your new shower head has a flow restrictor (small plastic insert in the connection). You can remove this if desired, though it will increase water consumption. Also check that the aerator screen isn’t clogged with debris from your old plumbing.
- Problem 5: Damaged Wall Fitting Threads: If the wall fitting threads are stripped or damaged, you can’t safely install any shower head. This requires a plumber to replace the wall fitting itself—not a DIY job as it involves cutting into your plumbing.
When to Call a Plumber:
- Corroded pipes visible behind the wall plate
- Damaged wall fitting that won’t hold threads
- Water damage visible around the wall connection
- You can’t remove the old unit despite penetrating oil and proper tools
- Any signs of leaking inside the wall cavity
Most shower head replacements are straightforward DIY projects, but if you encounter structural plumbing issues, professional help prevents bigger problems down the track.
Matching Your Shower Head Replacement to Your Bathroom
Your replacement shower head should coordinate with existing bathroom fixtures for cohesive design. Getting the finish and style right makes your new shower head look intentional rather than mismatched.
Finish Coordination
Match your shower head finish to your tapware and bathroom accessories for the most polished result.
- Chrome offers that classic, versatile finish that works with most bathrooms. It’s timeless, reflects light well, and coordinates easily with other fixtures. Chrome suits traditional and contemporary bathrooms equally well.
- Matte black delivers modern appeal and hides water spots brilliantly—this has become increasingly popular in Perth renovations. If you’ve installed black tapware or black bathroom accessories, a matte black shower head completes the coordinated look beautifully.
- Brushed gold brings premium, warm tones for a luxury aesthetic. This finish works particularly well in bathrooms where you’re creating a high-end, spa-like atmosphere. Light gold and champagne variations offer similar warmth with slightly softer tones.
- Brushed nickel provides soft metallic elegance that works with most colour schemes. It’s that middle-ground option that gives you sophistication without the boldness of black or gold.
Mixing finishes can work if intentional—a black shower head with chrome tapware creates deliberate contrast in modern bathrooms. However, matching finishes generally delivers the most cohesive design. When in doubt, coordinate your shower head finish with your tapware for visual consistency throughout the space.
Browse our complete bathroom tapware and bathroom accessories to coordinate finishes across your entire bathroom.
Style Compatibility
Different bathroom styles suit different shower head types:
- Traditional bathrooms: Classic chrome all-in-one heads work beautifully with heritage tapware and traditional bathroom fixtures. The Universal All Directional in chrome coordinates perfectly with this style.
- Modern and contemporary bathrooms: Rectangular or square designs in matte black finishes deliver that clean, angular aesthetic modern spaces require. The Rectangular Black All Directional or Cube system suits this style perfectly.
- Minimalist bathrooms: Clean lines and overhead rainfall configurations maintain the uncluttered aesthetic. Separate arm and rose combinations in chrome or brushed finishes provide luxury shower coverage without visual bulk.
- Family bathrooms: Directional spray and adjustable options accommodate different family members’ preferences. The Universal All Directional offers spray pattern adjustment that works well for households with varying needs.
- Small bathrooms: Standard all-in-one units don’t overwhelm the space visually. Vertical designs save visual bulk while delivering full functionality.
- Large or luxury bathrooms: Overhead hi-rise arm and rose combinations create statement impact. The Cube Hi-Rise system provides that premium shower experience larger bathrooms can accommodate comfortably.
Practical Considerations
Beyond aesthetics, practical factors influence which shower head works best for your specific bathroom:
- Ceiling height: Hi-rise arms need adequate clearance above the shower head for comfortable use. Measure your ceiling height before choosing overhead configurations to ensure sufficient headroom.
- Shower recess size: Large overhead roses suit spacious showers, while compact shower recesses work better with standard directional heads. Match your shower head size to your available space.
- User height: If you have very tall or very short household members, consider how the shower head height and angle accommodate everyone comfortably. Adjustable options work well for mixed-height families.
- Maintenance: Textured finishes like matte black and brushed metals hide water marks better than polished chrome, which shows every water spot. Choose based on how much cleaning effort you’re willing to invest.
- Budget: All-in-one units cost $35-$110, while separate arm and rose systems range are around $380. Both deliver excellent performance—the difference comes down to aesthetic preferences and budget availability.
Why Buy Replacement Shower Heads from Ross’s
At Ross’s Discount Home Centre, we stock quality shower head replacements with expert guidance. Here’s what sets us apart:
- Price range: $35-$380 covering budget to premium options. Both all-in-one units and separate arm and rose systems available.
- Finish options: Chrome, Matte Black, Brushed Gold, Gunmetal and Brushed Nickel. Expert staff help coordinate with your existing bathroom tapware and bathroom accessories.
- Perth showroom: See and feel products before purchasing. Test weight, examine finish quality, and visualise styles in person.
- Online shopping: $100 flat-rate Perth metro delivery available for browsing from home.
- Installation support: DIY guidance for confident homeowners or Perth plumber recommendations for professional installation.
- Quality assurance: 5-year manufacturer warranties on all shower heads. Most products carry 3-star WELS water efficiency ratings.
- Reliable stock: Popular models like Universal All Directional consistently available—no waiting for back-orders.
- Complete solutions: Part of our comprehensive bathroom products range. Coordinate shower heads, tapware, accessories, and fixtures with consistent finishes across everything.
Conclusion
Shower head replacement offers one of the most affordable bathroom upgrades you can tackle yourself. At Ross’s, our range spans $35 to $380, covering the Universal All Directional for budget-conscious replacements through to the Cube Hi-Rise system for premium overhead coverage.
Most Perth homeowners complete the installation in 15-30 minutes with basic tools—adjustable spanner, plumber’s tape, and a cloth. All-in-one units install directly to your wall fitting, while separate arm and rose systems require quick pre-assembly before installation. Both processes are straightforward DIY projects.
Match your shower head finish to your existing tapware for a cohesive design. Visit our Perth showroom to see the complete range in person, or shop online with a $100 flat-rate Perth metro delivery. Our staff can answer specific installation questions and help you choose the right shower head for your shower upgrade.