
Bathroom Renovation Mistakes to Avoid: Lessons From Someone Who’s Made Them
I must be crazy. In the last three years, I’ve done two complete home renovations, including three bathroom renovations. I’d never renovated a single bathroom before the first one, let alone two entire homes, so needless to say, there were some learning curves along the way. The bathroom renovation mistakes I made are ones I now have to live with until the next renovation, and they’re mistakes I see Perth homeowners repeat all the time.
Most bathroom renovation mistakes aren’t dramatic. They don’t happen because someone was careless or inexperienced. They happen because a decision was made too early, too late, or without understanding what it would affect downstream. A tile ordered before a rough-in was confirmed. A mirror hung without checking the alignment. A wall material chosen without checking its moisture rating. Small things that compound into problems you can’t easily fix once tiles are down.
This article combines the lessons from my own renovations with what I’ve seen across years of helping Perth homeowners at Ross’s Discount Home Centre. If you’re in the planning stages of a bathroom renovation, the 2026 Guide to Perth Bathroom Renovations covers the full process from start to finish. This article is specifically about what goes wrong, and how to make sure it doesn’t happen to you.
Mistake 1: Moving Plumbing Unnecessarily
Shifting a drain even 500mm on a concrete slab is not a minor change. It means cutting the slab, repositioning the waste pipe, re-screeding the floor, and restarting waterproofing from scratch. That one decision can add anywhere from $3,000 to $8,000 or more to your renovation before a single tile has been chosen. It is one of the most costly bathroom renovation mistakes Perth homeowners make, and in most cases, it was completely avoidable.
The fix is usually straightforward: design your renovation around your existing rough-ins. Your toilet, shower, and vanity positions are largely dictated by where the waste pipes already are. Work with that rather than against it. The money saved can go toward better fixtures, higher-quality tiles, or a contingency buffer for the surprises that inevitably come up during demolition.
That said, sometimes a layout change genuinely is worth it. If your existing layout is awkward, cramped, or simply doesn’t function well for how you use the space, the long-term benefit of getting it right can outweigh the upfront cost. The key is going in with a clear understanding of what it will add to your budget before you commit, not finding out when the plumber’s invoice arrives.
Mistake 2: Skimping on Waterproofing

Another bathroom renovation mistake that comes up constantly, and the most consequential one on this list, is skimping on waterproofing. Not the most expensive mistake upfront, but consistently the most expensive when it goes wrong.
I know this firsthand. During demolition on one of my own renovations, I found that the shower had been slowly leaking for years. The waterproofing membrane had failed, and water had been silently working its way into the subfloor the entire time. From the surface, the bathroom looked completely fine. When demolition began, the timber subfloor had rotted through entirely. Full subfloor replacement was required before any other work could proceed. The cost of fixing that failure, subfloor replacement plus full re-waterproofing from scratch, was far greater than a proper waterproofing job would have cost originally. That’s the thing about waterproofing failures: they don’t announce themselves. The damage accumulates quietly for years until demolition reveals the full extent of it.
A poor waterproofing job on a new renovation follows the same pattern. The bathroom looks perfect on completion. Two or three years later, water has been working its way into wall framing or subfloor and the damage is already significant. Rectification means pulling out tiles, removing the membrane, repairing structural materials, and starting the waterproofing process again from scratch. The repair bill always exceeds whatever was saved by rushing or skimping on this phase.
In Western Australia, waterproofing is a licensed trade. Only a licensed waterproofer can carry out and certify this work. Always request a waterproofing compliance certificate on completion of this phase . It confirms the work meets AS 3740 requirements and protects you if issues arise later. Any contractor who hesitates to provide one is a red flag.
For a full breakdown of what AS 3740 requires and what must be waterproofed in a Perth bathroom renovation, see the waterproofing section of our bathroom renovation guide.
Mistake 3: Retiling Over a Failed Waterproofing Membrane
One of the bathroom renovation mistakes to avoid that catches the most people off guard involves cosmetic refreshes rather than full renovations. If your bathroom looks tired but is otherwise functional, retiling can seem like the smart, cost-effective solution. It can be. But if the waterproofing membrane beneath those existing tiles has failed, tiling over the top doesn’t solve the problem. It locks it in and gives it another five to ten years to get worse before anyone notices.
This is distinct from Mistake 2. That’s about cutting corners on waterproofing during a new renovation. This is about skipping a waterproofing inspection entirely when doing a cosmetic refresh, and paying for it later.
Before you decide to retile rather than fully renovate, look for these warning signs:
- Tiles that sound hollow or feel soft underfoot when pressed
- Grout that keeps cracking in the same spots despite repeated regrouting
- A persistent musty smell in the bathroom that doesn’t clear with ventilation
- Visible damp patches or staining on walls adjacent to the shower or bath
- Paint bubbling or peeling on nearby walls
Any one of these warrants a waterproofing inspection before work begins. A licensed waterproofer can assess whether the membrane is intact or whether a full strip-out is required. That inspection costs a fraction of what it costs to tile a bathroom twice. And as I discovered during my own demolition, what looks fine on the surface can be hiding significant structural damage underneath.
If you are in any doubt, get the inspection done. The cost of retiling over a failed membrane is not just the retiling, it is the retiling, the waterproofing rectification, and whatever structural damage was allowed to progress in the meantime.
Mistake 4: Not Checking Walls Are Square Before Sheeting
This one is personal. Probably my biggest oversight across all three of my bathroom renovations was not checking that my walls were square before sheeting began. I assumed the builder had done it. He hadn’t. The result was a shower panel and toilet suite that didn’t sit flush against the wall. The shower panel needed excess silicon to fill the gap — not a good look, and not something I could fix without tearing out tiles. The toilet suite has the same issue. Both are still like that today.
Don’t assume your builder has checked this. Verify it yourself before a single sheet goes up. Use a spirit level or a laser line level across every wall surface that will have a fixture installed against it, particularly the walls your shower screen, toilet suite, and vanity will sit against. These are the surfaces where any deviation from square will be most visible in the finished bathroom.
The reason this matters so much is timing. Out-of-square walls can be corrected before sheeting at minimal cost. Once the walls are sheeted, waterproofed, and tiled, it is a permanent problem to live with until the next renovation. There is no easy fix after the fact.
One practical note on sheeting materials: if your walls are sheeted with Aqua Check plasterboard rather than fibre-cement sheeting, removing a large-format tile later is much more destructive. Fibre cement is more robust and allows tiles to be removed with less risk of damaging the sheet behind it. If your bathroom is likely to need any tile replacement or repair in the future, fibre cement sheeting is the more forgiving choice.
Mistake 5: Choosing Unsuitable Wall Materials for Wet Areas
Not all wall materials are created equal, and not all bathroom-suitable products are suitable for every zone within a bathroom. I learned this the hard way on my investment property renovation.
I decided to use VJ panelling on two walls to save money. It seemed like a smart call at the time. Cheaper than tiling, easier to remove if I renovated again in ten years, and it looked great. What I didn’t account for was that standard VJ panelling is not appropriate for high-moisture areas. You need semi-exterior grade board, which costs significantly more per panel than standard VJ. So the cost saving I was counting on largely disappeared before installation even began.
Then I discovered the second problem. Even though the VJ panelling was more than 1.2 metres from the showerhead, water still splashed across and wet the base of the panels regularly. I ended up having to add a kick-tile along the bottom of the VJ to protect it from direct water contact. A solution that worked, but one I hadn’t planned or budgeted for.
The broader lesson is this: research the moisture rating of any wall material before committing to it in a bathroom. A product that performs well on a general bathroom wall may be entirely unsuitable in or adjacent to the shower recess. Different zones within the bathroom have different moisture exposure levels, and the product specification needs to match the zone it will be installed in.
If you want a tile alternative that is genuinely suited to Perth bathroom conditions without the complexity of moisture ratings and zone restrictions, wet wall panels are worth considering. They are waterproof, low-maintenance, and designed specifically for wet area applications.
Mistake 6: Miscalculating Tile Requirements
I still don’t know how I managed this one, but I ran out of Terrazzo Grey tiles during one of my bathroom renovations. My tiler was on site with nothing to finish the job. And it wasn’t a simple matter of running to the nearest store to grab more. My tiles were shipped directly from our warehouse, and more critically, tiles are manufactured in batches. Order from a different batch and there will be visible colour variation between the old tiles and the new ones. Not subtle variation either. Noticeable enough that it would be obvious to anyone walking into the bathroom.
With no easy solution, I ended up using a completely different tile for one of the walls. As it turned out, our Matt White Wall Tile complemented the Terrazzo Grey well enough that it worked. But that was luck, not planning. It is not a situation you want to find yourself in mid-renovation with a tiler standing around waiting.
The rules to avoid this are straightforward. Always order at least 10% extra over your calculated tile requirement to account for cuts, wastage, and future repairs. Increase that buffer to 15% or more for complex layouts, diagonal patterns, or large-format tiles that require more cuts. Order everything from a single batch and record the batch number before the tiles leave the warehouse. If you do find yourself running short mid-renovation, contact your supplier immediately and check whether stock from the same batch is still available. The sooner you act, the better your chances of a match.
For our full range of bathroom tiles, including large-format porcelain, stone-look, and feature tiles, browse online or come into the store, where our team can help you calculate the right quantity for your project.
Mistake 7: Poor Lighting Planning
This mistake doesn’t appear in most Perth bathroom renovation guides, but competitors flag it consistently and I see the results of it regularly. Poor lighting planning is one of those bathroom renovation mistakes that only becomes obvious once the bathroom is finished and in daily use, at which point it is expensive to fix.
The most common error is relying on a single overhead downlight as the primary light source. A downlight positioned above the centre of the bathroom casts shadows directly downward onto the face at the vanity, making grooming genuinely difficult and giving the bathroom a clinical, flat feel regardless of how good the tiles and fixtures are. It is the lighting equivalent of choosing style over function.
The solution is layering. A well-lit bathroom uses three types of lighting working together:
- Ambient lighting for general illumination of the space
- Task lighting at vanity level, positioned to illuminate the face rather than cast shadows onto it
- Accent lighting for design impact, highlighting features like a niche, freestanding bath, or textured tile wall
Tile finish also affects how light behaves in the space, which is something most homeowners don’t consider until it is too late. Glossy tiles reflect and amplify light, making a bathroom feel brighter and larger. Matte and textured tiles diffuse light for a softer, warmer feel. Neither is wrong, but the two behave very differently under the same lighting conditions. Always sample your tiles under the actual lighting you plan to install before committing to them.
Like power outlets, lighting rough-ins must be planned before tiling begins. Adding a vanity light strip or wall sconce after tiles are down means cutting into tiled walls. Plan every light position with your electrician at rough-in stage.
On ventilation, which sits with lighting as an electrical planning consideration: exhaust fan sizing is consistently underestimated. The general rule is the fan should change the full air volume of the bathroom at least eight times per hour. For a standard 2.5x3m bathroom with 2.4m ceilings, that means a fan rated at a minimum of 144 m³/hr. Undersizing the fan is a mistake that leads to persistent moisture, condensation on surfaces, and eventually mould regardless of how well the bathroom is waterproofed.
Mistake 8: Not Planning Power Outlets Before Tiling
A bathroom renovation mistake to avoid that costs very little to get right and a lot to fix after the fact. Heated towel rails, LED mirrors with demister pads, and bidet toilet seats all require dedicated power outlets roughed in before walls are tiled. Most homeowners know this in theory, but make the decision too late, after trades have already moved on from the rough-in stage.
Once tiles are down, retrofitting a power point means cutting into tiled walls. It is disruptive, it is expensive, and it almost always leaves a visible patch where the tile has been cut or replaced. In a bathroom where you have carefully chosen a tile that may no longer be available from the same batch, that patch will be noticeable.
At rough-in stage, adding a power point costs almost nothing extra. It is a ten-minute job for your electrician while the walls are still open. After tiling, the same job involves cutting tiles, chasing walls, patching, and regrouting. The cost difference is significant.
Before your electrician begins rough-in, give them a complete list of every powered accessory going into the bathroom and exactly where each one will be positioned. Do not leave anything off the list, assuming it is obvious. Bidet toilet seats are a good example. They require a power outlet positioned directly behind the toilet, low on the wall. Many electricians will not think to include this unless specifically told, because it is not a standard bathroom power point position. The same applies to heated towel rails, which need an outlet at the right height for the rail model you have chosen, and LED mirrors, which need power fed to the exact centre point of where the mirror will sit.
Decide on every powered accessory during the planning phase. Lock in positions before rough-in begins. It is one of the simplest bathroom renovation mistakes to avoid.
Mistake 9: Not Being Present During Key Installations
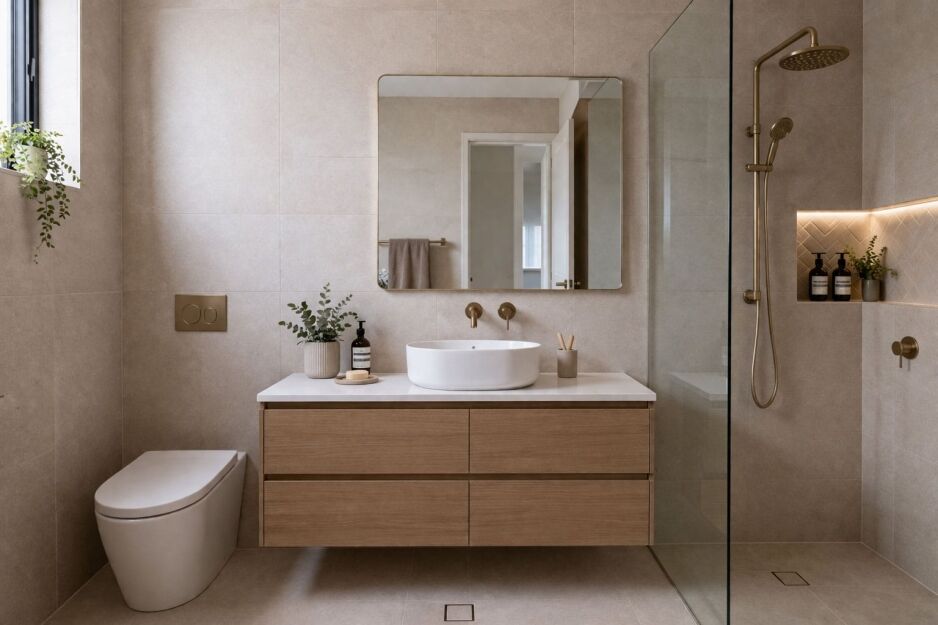
This one still bothers me. I marked out every single bathroom fitting with tape before installation day, showing precisely where each accessory was to go. Every towel rail, every robe hook, every toilet roll holder. I thought the mirror position was self-evident. It would obviously be centred over the vanity. I didn’t mark it out.
I came back an hour later to find the mirror installed a good 200mm to the left of the vanity, aligned with nothing, screwed directly into tile. I called my tiler, who confirmed what I already suspected. It could not be fixed. Pulling the mirror off and repositioning it would leave screw holes in the tile that the mirror would not cover in its correct position. Replacing the tiles risked pulling the Aqua Check plasterboard off the wall with them. The mirror is still off-centre today.
It is not a dramatic mistake. Most people who visit the bathroom would never notice. But I notice it every single day, and I will notice it until the next renovation.
The lesson is simple. Be present for any installation where alignment, positioning, or centring matters. This includes mirrors, shower screens, vanity units, and toilet suites. Do not assume that what seems obvious to you is obvious to the person doing the installation. Trades work quickly and make reasonable assumptions. Those assumptions will not always match your intentions.
Mark out the position of anything that will be fixed to a tiled wall before installation day. Use tape, use a pencil, use whatever works. Do not rely on verbal instructions alone. If you cannot be present during a specific installation, make sure your instructions are written down and confirmed with the tradie before they start. A bathroom renovation mistake like this one takes about thirty seconds to prevent and a lifetime to live with.
Mistake 10: Choosing a Tiler Based on Recommendation Alone
When I bought my investment property, the tenant moved in the day after settlement. A week later they told me the shower walls were moving. There was termite damage from the building report, but I had no idea of the extent until I looked properly. I needed a complete bathroom renovation done urgently, and my regular tiler had a three-month waiting list. So I did what anyone would do and asked friends and family for recommendations.
It was a bad experience from start to finish. The work was completed, the bathroom was functional, and most people would look at it and say the tiling was fine. But by the standards I hold for tiling work, it fell well short. The lesson I took from it is that some people’s idea of a good tiler is very different from mine, and relying on a recommendation without seeing the work firsthand is a risk not worth taking.
Before hiring any tiler, ask to see a portfolio of recent work. Instagram is genuinely one of the best places to find a skilled tiler. Good tilers are proud of their work and photograph it regularly. If a tiler has no portfolio and no online presence showing completed bathrooms, that tells you something. Get at least two quotes and compare not just price but how they communicate, whether they understand your brief, and whether they ask the right questions about your project.
A good tiler will ask about your tile format, your preferred layout pattern, your grout colour choice, and what products you are using. They will want to understand the full scope before quoting. A tiler who quotes without asking any of these questions is either very experienced and making assumptions, or not experienced enough to know what they need to know. In WA, tiling in wet areas should be carried out by a licensed tiler. Always verify the licence before work begins and check they carry adequate insurance. A recommendation from a friend is a starting point, not a reason to skip your own due diligence.
Mistake 11: Ignoring Layout and Clearances
Layout mistakes are flagged consistently by every competitor article on this topic, and they are entirely absent from our existing bathroom renovation content. That gap ends here, because poor layout decisions are among the most frustrating bathroom renovation mistakes to live with. Unlike a poorly positioned mirror, a bad layout affects how you use the bathroom every single day.
The most common clearance mistakes are surprisingly basic. A toilet positioned in direct line of sight from the door. Vanity drawers that cannot open fully without hitting the toilet suite. A shower door that swings into the main traffic path through the bathroom. A vanity chosen for how it looks in the showroom that consumes so much floor space the bathroom feels cramped in daily use. None of these are dramatic design failures. They are small spatial errors that compound into daily frustration.
The fix is simple and costs nothing. Before ordering a single fixture, tape out the footprint of every item on the bathroom floor using masking tape. Mark where the door swings. Mark where the drawers open. Then walk through the space as if you are actually using it. Stand at the vanity. Step into the shower. Sit on the imaginary toilet. Open the imaginary drawers. If anything feels tight or awkward on the floor with tape, it will feel worse once the fixtures are installed and the room feels smaller with walls and a ceiling.
Double vanities are a specific consideration in Perth ensuites. They look aspirational in a showroom and they are genuinely functional in a master ensuite with adequate floor space. But in a smaller ensuite they consume floor space that makes the room feel cramped and limits movement around the toilet and shower entry. Measure your ensuite carefully before committing to a double vanity configuration.
Minimum clearances around bathroom fixtures are set by the National Construction Code. Confirm the specific requirements for your layout with your plumber or building surveyor before finalising any selections. Getting this wrong is not just inconvenient. In some cases it is non-compliant.
Mistake 12: Underestimating the Total Budget
The most common budget mistake in bathroom renovations is not overspending on tiles or tapware. It is calculating material costs, forgetting labour, and having no contingency when demolition reveals something unexpected behind the walls. I have already mentioned finding a rotted subfloor during demolition on my own renovation. That was not in any budget. It could not have been, because it was not visible until the old bathroom was stripped out. But having a contingency meant it did not derail the entire project.
Labour typically accounts for up to 30% of a mid-range bathroom renovation cost. Homeowners who budget only for products and materials consistently go over budget before trades have even finished. A plumber, electrician, waterproofer, tiler, and carpenter all need to be factored in from the start, not added up after the fact when the material budget has already been spent.
The hidden costs that catch Perth homeowners out most often are:
- Asbestos removal in homes built before 1990, which requires a licensed removalist and adds meaningful cost before demolition can even begin
- Uneven subfloors requiring additional screeding to establish correct falls before waterproofing
- Outdated plumbing that needs upgrading to current WA standards once walls are opened
- Water-damaged wall framing that was not visible before demolition began, as I found firsthand
Always add a 10 to 20% contingency on top of your total quoted renovation cost. Not as a vague mental buffer but as a real line item in your budget that you set aside before work begins and do not touch unless something unexpected comes up. If nothing unexpected comes up, you have money left over. If something does come up, and in Perth bathroom renovations, something usually does, you are covered.
For realistic 2026 cost figures broken down by bathroom size and renovation tier, see How Much Do Bathroom Renovations Cost. And before you start getting quotes, How to Budget a Bathroom Renovation is worth reading to make sure your budget accounts for everything it should.
FAQs
Conclusion
Every mistake on this list is avoidable. Not with expensive professional oversight or years of renovation experience, but with preparation, the right questions asked at the right time, and an understanding of what each decision affects downstream. My own bathrooms turned out well despite the mistakes. The off-centre mirror, the VJ panelling, the mismatched tile wall. Most people walk in and see a great bathroom. But I know what I would do differently, and sharing that is worth more than any glossy renovation guide that only shows the finished result.
If you have questions about products, finishes, or where to start with your bathroom renovation, come and see us at Ross’s or browse our full bathroom range online. We have been helping Perth homeowners get their bathrooms right for over 50 years. That experience is there for you to use before you make the mistakes, not after.