
DIY Laundry Renovation: How to Renovate Your Laundry Step by Step
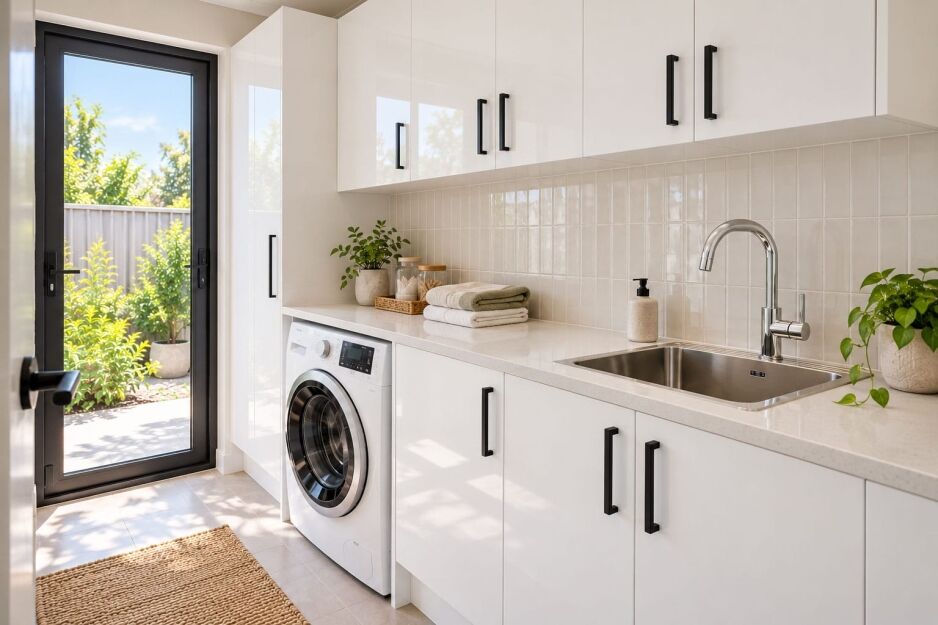
A DIY laundry renovation is a great way to turn a tired, awkward laundry into a space that actually works for your household. Maybe you’re short on bench space, the cupboards have seen better days, or you’re constantly squeezing past the washing machine. Whatever the problem, renovating your laundry yourself is more achievable than you might think.
With a good renovation plan and the right products, there’s plenty you can do yourself. Pre-assembled laundry cabinets take the hassle out of building cupboards, while a little planning helps you work out what needs replacing, what can stay, and when to bring in a licensed tradie.
I’ve tackled laundry renovations in my own properties, and I’ve seen how much difference good planning makes. At Ross’s, we supply the cabinets, sinks, tapware and other essentials to help Perth homeowners tackle their own renovations. Here’s how to approach yours, step by step.
Plan Your Laundry Renovation Before You Buy Anything
A successful laundry renovation starts well before you pick out new cabinets or a benchtop. Work out what isn’t working in your current laundry, what you’d like to improve, and how much of the existing room you can keep. A little planning now can save you from expensive changes once the renovation is underway.
Decide What Needs Changing and What Can Stay
Take a good look at your existing laundry. Are the cabinets falling apart, or do they just look dated? Is there enough bench space? Does the sink work where it is? Check for water damage, poor storage and anything that makes doing the washing harder than it should be.
You might find that replacing the cabinetry and benchtop is enough. If the layout is genuinely awkward, though, this is your chance to fix it. Just remember that moving plumbing adds work for your plumber, so make those decisions early.
Measure the Room, Appliances and Cabinet Clearances

Before ordering anything, grab a tape measure and put together a laundry renovation checklist. You’ll need to record:
- The room’s width and depth, measuring at several points.
- Door and window positions, including which way doors open.
- Washing machine and dryer dimensions, including the manufacturer’s required clearances.
- Existing water pipes, waste outlets and power points.
- Available wall space for overhead cupboards.
- Benchtop depth and space around the laundry sink.
- Access through doorways for bringing pre-assembled cabinets into the room.
Don’t forget to check that appliance doors can open fully and drawers won’t clash with them.
Sketch the Layout Before Ordering
Once you’ve measured everything, sketch the room and mark where each cabinet, appliance and fixture will go. Our free 3D kitchen planner can also help you visualise cabinet positioning, although you’ll still need to confirm all measurements and service locations.
I learnt the value of this during one of my own renovations. The hot water system was taking up useful space in the laundry. After planning the layout, I had it relocated outside, which freed up room for a much more practical setup.
If you’re unsure which cabinets will work best, our guide to choosing laundry cabinets is a good starting point. We’ve also put together some laundry cupboard layout ideas to help you make the most of the available space.
Free DIY Laundry Renovation Checklist
Before you start pulling out old cupboards, download our free printable checklist. It covers room measurements, product selection, trade bookings and the main renovation steps, with handy spaces for your measurements and notes.
Print it out and tick things off as you go. It’ll help you keep your renovation organised from the first measurement to the final checks.
Download the Free DIY Laundry Renovation Checklist (PDF)
What Can You DIY and When Should You Book a Tradie?
One of the best things about renovating your own laundry is how much of the work you can take on yourself. You don’t need to be a qualified builder to plan a great layout, choose your products or install suitable pre-assembled cabinets. The trick is knowing which jobs you can tackle and where a little professional help makes sense.
Can You Renovate Your Laundry Yourself?
Yes, you can complete much of a DIY laundry renovation yourself, including measuring, planning, fitting suitable cabinets and handling simple finishing jobs. You can also manage the project and organise your own trades. You’ll just need a licensed plumber or electrician for work involving fixed plumbing and electrical connections.
Here’s a quick guide to what you can tackle yourself and what to leave to the professionals.
| Suitable DIY Jobs | Jobs for Qualified Trades |
| Measuring and planning the layout | Connecting new sink plumbing |
| Choosing and ordering products | Relocating water and waste pipes |
| Installing suitable laundry cabinets | Installing or moving power points |
| Painting and fitting handles | Fixed electrical wiring |
| Suitable finishing and decorative work | Assessing suspect asbestos or specialist wet-area work |
Knowing how to renovate a laundry yourself doesn’t mean doing every job alone. In my experience, the best approach is to handle the work you’re comfortable with and book the right tradies for everything else.
For plumbing, the WA guidance on plumbing work at home explains which jobs require a licensed plumber.
That way, you’re still in charge of your renovation, with professional help exactly where you need it.
Choose and Order the Right Laundry Products
Once you’ve settled on a layout, it’s time to choose the products that will bring your new laundry together. One of the biggest advantages of renovating with pre-assembled cabinetry is that the cupboards arrive already built. That means less time putting cabinets together and more time getting them into position. You’ll still need to measure carefully and install them correctly, but much of the hard work is already done.
Start With Pre-Assembled Laundry Cabinets
Your cabinetry will do much of the heavy lifting in your new laundry, so choose a combination that suits the space and how you use it. Base cabinets provide storage beneath the benchtop, drawer units keep smaller items organised, and overhead cupboards make good use of empty wall space. If you have the room, a tall cabinet is handy for brooms, mops and cleaning supplies.
Our pre-assembled laundry cabinets are a great option for DIY renovators. They come in modular sizes, arrive assembled and are backed by a 10-year warranty.
I’ve fitted pre-assembled cabinetry in my own renovation projects, and getting the cupboards built is rarely the biggest challenge. It’s making sure everything is level, properly secured and positioned so the doors and drawers open freely. Take the time to check your cabinet sizes and wall fixing requirements before ordering. It’ll make installation much easier.
Check Benchtop, Laundry Sink and Tap Compatibility
Your choice of sink and benchtop affects how everything fits together. An all-in-one laundry unit combines the tub and cabinet, while a separate sink and benchtop give you more flexibility with the finished layout.
Before ordering, check the benchtop depth, sink cut-out requirements, cabinet support and tap mounting position. Make sure there’s room for the plumbing beneath the sink, too. Follow the product’s installation instructions, particularly if the benchtop needs cutting.
We stock a range of laundry sinks and troughs and laundry tapware to complete your setup. If you’re unsure which sink will work best, our guide to choosing a laundry tub will help.
Confirm Everything Before Installation Day
Before placing your order, go over your measurements one last time. Check cabinet sizes, finishes, handles, filler panels and any accessories you’ll need. Make sure your assembled cabinets will fit through the doorways and into the laundry.
Once everything arrives, inspect the products and keep the installation instructions together. There’s nothing more frustrating than getting halfway through a weekend renovation and discovering you’re missing a fitting or have ordered the wrong size.
A good laundry renovation guide will tell you what to buy. I’d go one step further: make sure everything works together before you start pulling the old laundry apart.
Prepare the Room and Remove Old Fittings Carefully
With your products sorted and your renovation plan ready, it’s time to prepare the laundry. You don’t need to rush into demolition. Clearing the room properly and checking what’s underneath the old fittings will make installation much easier.
Clear, Protect and Check the Existing Room
Start by emptying the cupboards, removing loose items and moving freestanding appliances out of the way. Protect adjoining floors and doorways, especially if you’ll be carrying old cabinets out and bringing new ones in.
Take a few photos of your existing plumbing, power points and fixtures before removing anything. Check for moisture damage, loose tiles or damaged wall surfaces that might need attention.
If fixed plumbing or electrical connections need disconnecting, organise the appropriate tradie before removing the fixtures.
Older homes can contain asbestos in wall sheeting, flooring and other materials. If you’re unsure, follow WorkSafe WA’s asbestos guidance and have suspect materials checked before disturbing them.
Prepare Surfaces for the Chosen Finish
Once the old fittings are out, check that the walls and floor are sound, dry and ready for the new products. Repair damaged surfaces where appropriate, or arrange professional repairs if needed.
Don’t assume you need to strip every wall just because you’re replacing the tiles. The condition of the existing surface and your chosen finish will determine how much preparation is necessary.
If you’re changing wet-area finishes, confirm any moisture protection or waterproofing requirements before the new surfaces go on.
A little extra attention to surface preparation now will make fitting your new cabinets and benchtop much more straightforward.
Complete the Renovation in the Right Order
With the old laundry cleared and the surfaces prepared, you’re ready to put everything together. Following the right laundry renovation steps will help you avoid delays, unnecessary expenses and having to undo work you’ve already finished.
The exact order will depend on your layout and whether you’re moving plumbing or electrical services, but most laundry projects follow a similar sequence.
A Practical Laundry Renovation Sequence
- Finalise your layout and measurements. Confirm cabinet positions, appliance clearances and plumbing locations before making any changes.
- Order your products. Have your cabinets, benchtop, sink, tapware and other essentials ready before work begins. Check delivery access and inspect everything when it arrives.
- Organise the initial trade work. Have your plumber or electrician disconnect existing fixtures and complete any necessary plumbing or electrical changes.
- Remove the old fittings. With the relevant services safely disconnected, remove suitable old fixtures and prepare the room for its new layout.
- Prepare the walls and floor. Complete any necessary repairs, tiling or wet-area treatments. Allow adhesives, grout and other materials to dry or cure as directed.
- Install cabinets and benchtops. Position and secure your pre-assembled cabinetry, then fit the benchtop according to the product instructions.
- Arrange final connections. Have your plumber connect the new sink and tapware, and your electrician complete any required electrical work.
- Finish and inspect. Fit handles and accessories, check clearances and make sure everything works before putting the laundry back into use.
Some trades may need to visit twice, once for the initial work and again for final connections. Confirm this when booking so you’re not left waiting with an unfinished laundry.
Avoid the Delays That Waste a Weekend
There’s nothing worse than setting aside a weekend to fit your new laundry, only to discover a missing cabinet filler, the wrong sink cut-out or a drawer that hits the washing machine.
Before starting, check your product instructions, cabinet fittings and service positions. Make sure wall repairs are dry and allow the required curing time for adhesives and finishes.
A few checks beforehand can save hours of frustration once the tools come out.
Installing Laundry Cabinets, Benchtops and Finishing Touches
This is where all that planning starts paying off. Your new laundry is finally taking shape, and with the right preparation, there’s plenty of hands-on work you can tackle yourself. One of the biggest advantages of using pre-assembled cabinetry for DIY laundry renovations is that you can get straight into positioning and fitting the units without spending hours building them first.
Position, Level and Fix Your Laundry Cabinets
Start by positioning your base cabinets along the wall, without securing them just yet. Check that everything fits as planned, paying attention to plumbing access, wall alignment and the space needed for appliances.
Use a spirit level to check each cabinet, adjusting as needed so the units line up neatly. Once you’re happy with the positioning, secure them using the manufacturer’s recommended fixings and suitable structural support.
Take extra care with overhead cupboards. They’re heavy and need secure wall fixings, so get someone to help you lift and position them. Once everything is fitted, check that doors and drawers open freely without hitting nearby cabinets or appliances.
Fit the Benchtop and Arrange Final Connections
With your base cabinets secured and level, you can move on to the benchtop. Double-check its measurements, any sink cut-out and the fitting instructions before making cuts.
Protect the finished surface while working and check that the sink, tapware and appliances have the clearances they need.
Once the benchtop and sink are in position, arrange for your plumber to complete the connections. Make sure there’s enough room behind the washing machine for hoses and any ventilation clearances specified by the manufacturer.
Add the Finishing Touches
Now for the satisfying part. Fit your cabinet handles, finish any suitable painting or splashback work, and add practical accessories such as hooks or a wall-mounted drying rack.
You don’t need expensive finishing touches to make a laundry look great. Neatly aligned cabinets, a clean splashback and matching handles can make an enormous difference.
Before you pack away the tools, give everything a good clean. You’re nearly ready to put your new laundry to work.
Final Checks Before Using Your New Laundry
Your laundry might look finished, but don’t start loading the cupboards just yet. A successful DIY renovation is about having a laundry that works just as well as it looks. Spending a little time checking everything now can save you a few frustrating surprises later.
Your Laundry Renovation Final Checklist
- Open every door and drawer. Check that nothing catches, rubs or needs adjusting.
- Test appliance clearances. Make sure the washing machine and dryer doors open fully without hitting cabinets or handles.
- Check cabinet fittings. Look for loose handles, misaligned doors and drawers that don’t close properly.
- Inspect the finishes. Check splashback edges, benchtop joins and seals against the installation requirements.
- Look for leaks. After your plumber has completed the connections, check visible pipes and fittings for drips.
- Run your appliances. Follow the manufacturer’s instructions and check that hoses aren’t kinked or crushed behind the machine.
- Check ventilation and access. Make sure appliances have the required airflow and there’s room to clean around them.
- Keep your paperwork. Store product warranties, installation instructions and relevant trade documents somewhere handy.
It’s often the little things that cause the most annoyance after a renovation. A drawer that hits the washing machine or a hose trapped behind a cabinet is much easier to sort out before everything is packed away.
If you notice a leak from a new connection or a problem with work completed by a tradie, get them back to fix it. Then you can put everything away and enjoy having a laundry that makes everyday jobs that little bit easier.
DIY Laundry Renovation FAQs
Most DIY laundry projects raise a few questions before the work begins. These answers cover the jobs you can tackle yourself, the products to organise and when to book a tradie.
Ready to Tackle Your Own Laundry Renovation?
A DIY laundry renovation is well worth considering if you want a more practical laundry without paying someone else to manage every part of the project. With a good plan, the right products and a little help from the tradies where needed, you can achieve a result you’ll be proud of.
At Ross’s Discount Home Centre, we’ve helped Perth homeowners with their renovations for decades. Our range of pre-assembled laundry cabinets, sinks, tapware and other laundry essentials makes it easier to get the products you need in one place, without blowing the renovation budget.
If you’re ready to get started, browse our laundry range online or visit us at 57 James Street, Guildford. Our friendly team can help you choose the right products for your space and budget. And don’t forget to download our free DIY Laundry Renovation Checklist to keep everything organised from start to finish.
