
How to Install a Bath: Steps for Different Bath Types
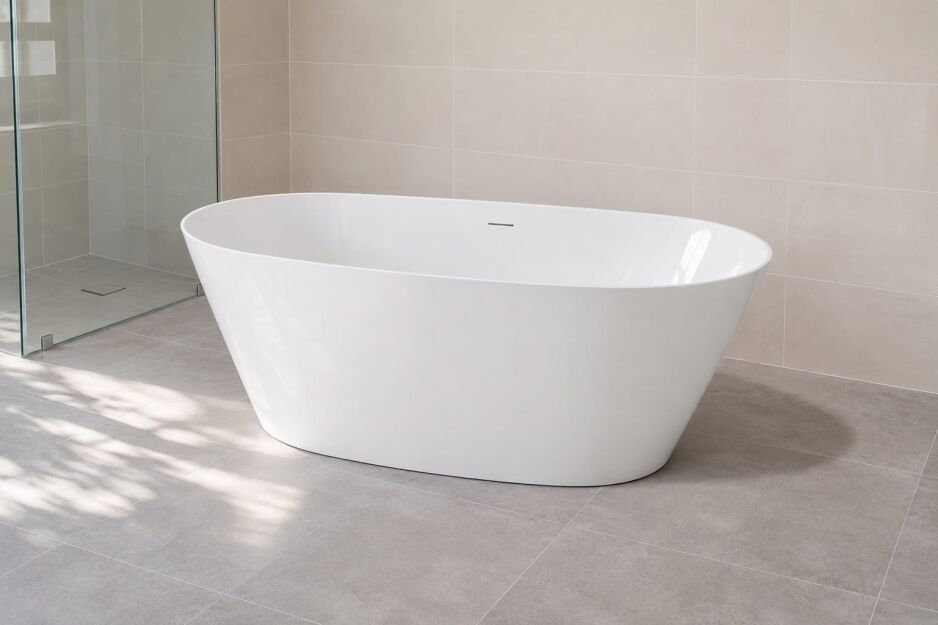
Knowing how to install a bath starts with understanding how that particular bath is designed to be fitted. A freestanding bath generally goes onto a prepared, finished floor, while an inset bath may need a supporting frame or hob, with some wall finishing completed after the bath is positioned. Back-to-wall and corner baths can have their own installation requirements, too.
These differences matter because the supports, fixing methods and installation sequence aren’t the same for every bath. Getting the order wrong can mean pulling apart finished work to correct something that should have been checked earlier.
Whether you’re replacing an old bathtub or fitting a new one, the manufacturer’s instructions should always guide the installation. We’ll cover what needs to be prepared, how to install the different bath types, and the final checks that help ensure everything is secure, properly connected and ready to use.
Before You Install a Bath
A little preparation makes bath installation much easier, especially if you’re replacing an existing bathtub. If you haven’t chosen your bath yet, it’s worth settling on the right type before planning the installation. Our guide on how to choose a bath explains how to compare bath styles, materials, sizes and layouts to find the best fit for your bathroom.
Before starting, check that the bath, surrounding surfaces and plumbing are ready for the installation method specified by the manufacturer.
- Inspect the bath: Check for damage and confirm that all supplied components are present, including support feet, brackets and waste fittings where applicable.
- Read the installation instructions: Check the manufacturer’s requirements for supporting, levelling, fixing and sealing the bath.
- Check the floor and surrounding walls: Make sure the floor is sound and suitable for the bath’s weight. Confirm whether the installation requires finished surfaces or further framing, waterproofing and tiling.
- Confirm the waste position: Check that the bath outlet aligns with the prepared drainage and that there’s enough access to complete and test the connection.
Standalone freestanding baths generally go onto prepared, finished surfaces. Inset baths may need a frame or hob, with some wall junctions completed after positioning. Back-to-wall and corner models have their own support and finishing requirements. Check the manufacturer’s instructions before deciding the support, fixing and waterproofing sequence.
How to Install a Freestanding Bath
Freestanding bath installation is generally straightforward once the bathroom floor, wall finishes and plumbing are prepared. Unlike an inset bath, a standalone freestanding bath doesn’t need a surrounding hob or tiled enclosure. However, the positioning, support and fixing methods must follow the instructions for your particular model.
1. Check the Finished Position, Floor and Waste Alignment
Start by checking that the finished floor is clean, sound and suitable for supporting the bath. The floor and surrounding finishes should already be complete where required by the installation instructions.
Check the position of the existing waste outlet against the bath’s waste opening. You’ll also need enough access to connect the waste and position the bath without damaging the finished surfaces.
Before going further, check any required clearances around the bath, particularly if it will sit close to a wall.
2. Adjust and Check the Approved Supports

Many acrylic freestanding baths use adjustable support feet beneath the bath, although the exact arrangement varies between models.
Where adjustable feet are supplied, set them according to the manufacturer’s instructions. Use a spirit level to check the bath and adjust the feet until it sits correctly.
Here’s the important part: On models designed to carry their weight through support feet, those feet must bear the load. The decorative outer skirt shouldn’t accidentally become the main support because the feet haven’t been adjusted correctly.
Check that every required support makes proper contact and that the bath remains stable before continuing.
3. Dry Position, Arrange the Waste Connection and Secure the Bath
Carefully position the bath temporarily to confirm that everything lines up. This trial placement helps identify any problems with the waste connection or access before the bath is fixed in place.
Have the licensed plumber connect the waste and overflow, where fitted. Depending on the bath’s design, the connection may be completed before or during final positioning.
Once the connection is arranged, position the bath on its supports and secure or stabilise it using the manufacturer’s approved method. Some models have specific floor-fixing arrangements, while others use different stabilisation systems.
Don’t assume that every freestanding bath needs to be fixed to a wall or that silicone alone is sufficient to hold it in place.
4. Test and Finish as Specified
Before using the bath, check that it is level, stable and correctly supported. The plumber should test the waste and overflow connections and confirm that water drains properly without leaks.
Complete any floor or perimeter sealing specified by the manufacturer. A standalone freestanding bath generally doesn’t require a new tiling or waterproofing stage at this point because the relevant bathroom finishes are already complete.
Finally, follow the specified sealant curing period before filling or using the bath.
How to Install an Inset or Built-In Bath
Installing an inset or built-in bath is different from fitting a freestanding model. The bath is generally recessed into a supporting frame or hob, with the surrounding finishes forming part of the installation. Depending on the design, some waterproofing and tiling work must be coordinated with the bath’s final position.
1. Prepare the Frame, Hob and Specified Base Support
Start by preparing the bath frame or hob according to the manufacturer’s installation instructions. The structure needs to accommodate the bath’s dimensions, rim height and required supports, while allowing access to the waste connection.
A bath hob frame provides the structure for the surrounding enclosure and finishes, but it doesn’t necessarily support the full weight of the bath. Many inset baths require separate support beneath the base, such as adjustable feet or another manufacturer-approved arrangement.
Check that the floor is sound and that the supporting structure is correctly positioned before lowering the bath into place.
Don’t assume the rim carries the weight. An incorrectly supported bath can flex when filled, placing stress on the surrounding tiles, seals and plumbing connections. The base and rim must be supported exactly as specified for the model.
2. Position and Level the Bath on Its Approved Supports
Carefully lower the bath into the prepared opening, making sure it rests correctly on its specified supports.
Use a spirit level to check the bath according to the manufacturer’s instructions. Check the rim height against the surrounding frame and confirm that the bath aligns correctly with any adjoining walls.
If the bath has adjustable feet, set them as directed so the weight is properly supported. Where another base support method is specified, follow that arrangement instead.
Check any tiling flange or wall junction requirements before securing the bath. These details can affect how the wall lining, waterproofing and tiles are finished around it.
Once positioned, secure the bath using the approved fixing method.
3. Connect and Test the Waste Before Closing Access
With the bath in position, have the licensed plumber complete the waste and overflow connections, where applicable.
The plumber should check the connections and test for leaks before the surrounding hob or access panels are permanently enclosed.
This is particularly important with built-in baths because reaching a concealed waste connection after tiling may require removing finished surfaces.
Keep any manufacturer-required inspection or maintenance access available.
4. Complete the Applicable Bath-to-Wall Waterproofing and Finish
The finishing sequence depends on how the inset bath meets the surrounding walls.
Some waterproofing work may already have been completed before the bath was positioned. Other details, particularly around a tiling flange or tile bead, may need to be completed once the bath is secured.
Follow the approved waterproofing system for the bath and wall construction. This includes the relevant membrane, waterstop and junction details, as outlined in the Australian Building Codes Board’s waterproofing guidance.
Once the required waterproofing work is complete, the surrounding wall finishes and tiles can be installed in the specified sequence.
Apply the appropriate flexible sealant to the finished bath-to-wall junctions. Remember that silicone is a finishing seal, not a substitute for the waterproofing system beneath it.
Getting this sequence right is essential. If the bath moves because of inadequate support, or the wall junction is incorrectly finished, leaks and damaged tiles can become difficult and expensive to repair.
Installing a Back-to-Wall or Corner Bath
Back-to-wall and corner baths need particular attention where they meet the bathroom walls. While some follow a similar installation process to freestanding baths, others have integrated tile beads or fixing requirements that change how they’re positioned and finished.
Back-to-Wall Baths
A back-to-wall bath is installed directly against a wall, but the correct method depends on its construction.
Some models are fitted against an already tiled and waterproofed wall, much like a freestanding bath. Others have an integrated tile bead or flange that needs to be incorporated into the wall-finishing and waterproofing system.
Before positioning the bath, check the manufacturer’s instructions for support, fixing and waste access. The bath must sit correctly against the wall without interfering with the plumbing connections or specified supports.
Once it’s secured and the required wall finishes are complete, seal the bath-to-wall junction as directed. Don’t assume silicone alone is sufficient where a waterproofing junction is required.
Corner Baths
Corner bath installation depends on whether you’re fitting an inset corner bath or a back-to-corner freestanding model.
An inset corner bath may require a supporting frame or hob, following the same principles as other built-in baths. A back-to-corner freestanding bath generally uses its own support system.
The main difference is that corner baths have two wall junctions to consider. Both need the correct alignment, waterproofing details and finishing seals.
Check the waste position carefully, particularly on left-hand and right-hand configurations, and confirm that plumbing access remains available where required.
Follow the manufacturer’s fixing and sealing instructions for the specific model.
Final Bath Installation Checks
Once the bath is installed and all required finishing work is complete, a few final checks will help confirm everything is secure and ready to use. These checks apply to freestanding, inset, back-to-wall and corner baths, regardless of their different installation methods.
- Stability and support: Check that the bath is level, stable and resting correctly on its specified supports. It shouldn’t rock or move unexpectedly.
- Fixings and finished edges: Confirm that brackets, mounting points and surrounding finishes are secure, with no visible gaps or damage.
- Waste and overflow: Have the plumber confirm that the bath waste connection and overflow, if fitted, have been properly connected and tested for leaks.
- Drainage: Check that water flows freely through the waste without pooling unexpectedly. Any drainage problems should be investigated before use.
- Waterproofing and seals: Confirm that the required waterproofing, finishing seals and bath-to-wall junctions are complete, with no visible gaps.
- Curing time: Follow the manufacturer’s specified curing periods for sealants, adhesives and other installation materials before filling or using the bath.
Once these checks are complete and the installer has confirmed everything is ready, the bath can be used with confidence.
Bath Installation FAQs
Bath installation can raise a few questions, particularly around plumbing, waterproofing and the order of work. Here are answers to some common questions about fitting a bath in an Australian home.
Getting the Bath Installation Right
Knowing how to install a bath properly comes down to following the correct method for its design. A freestanding bath, an inset bath and a back-to-wall bath can all have different support, fixing and finishing requirements, so there’s no single installation sequence that suits every model.
The most important things are getting the bath stable and level, making sure the waste connections are properly tested, and completing any required waterproofing and sealing in the correct order.
Follow the manufacturer’s installation instructions, coordinate any required plumbing and waterproofing work, and don’t rush the final checks. A properly installed bath should feel solid, drain correctly and remain secure without movement or leaks.
