
How To Tile A Kitchen Splashback: Setting Out, Laying And Finishing
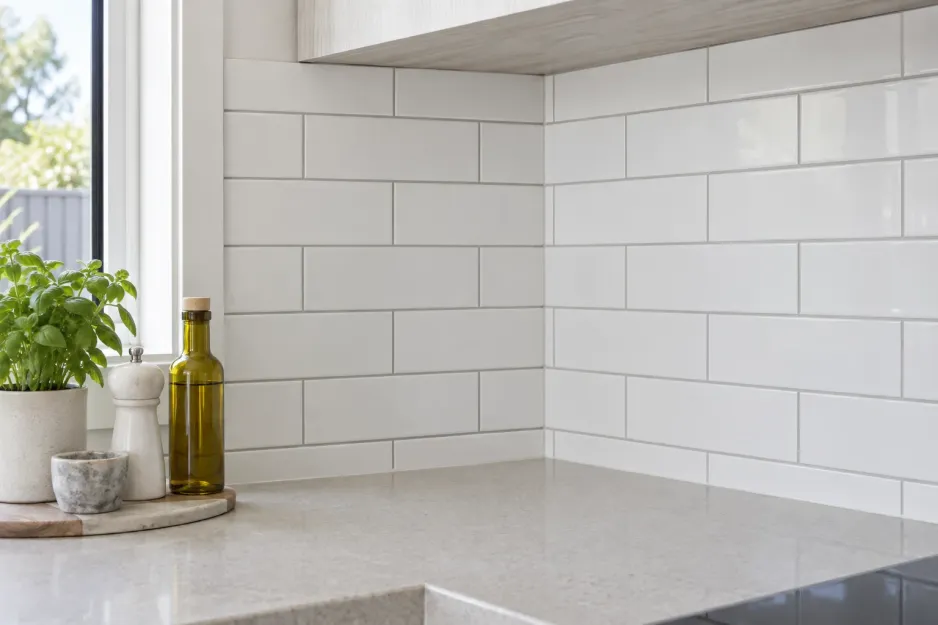
The thing that gives away a DIY splashback is almost never the tiling. It’s the setting out. Nine times out of ten the adhesive is fine, and the grout is fine, but there’s a 15mm sliver of cut tile sitting at one end of the run, and your eye goes straight to it every time you walk in.
Learning how to tile a kitchen splashback is mostly about the half hour before you open the adhesive. Work out your centre line, dry-lay the first row, and the rest is slow, satisfying work. Skip that, and no amount of care with the trowel will save it.
This is one of the better tiling jobs to start on if you’re a beginner. Most Perth splashbacks are a weekend project, and the hands-on part is shorter than you’d expect. I’ll take you through all of it: deciding whether to tile over or strip back, prepping the wall, setting out, adhesive and notch sizes, cutting around power points, then grouting and sealing the edges.
What’s Involved In Tiling A Kitchen Splashback
- Prepare the wall. Flat, clean, primed.
- Set out. Centre line, then dry-lay a row.
- Apply adhesive. Notched trowel, small sections.
- Lay the tiles. Spacers between every one.
- Grout. Once the adhesive has cured.
- Silicone. Benchtop junction, corners, bottom row.
Nobody asks how to tile a kitchen splashback without also asking how long it takes. Half a day goes on prep and setting out, two to four hours on laying, an hour or two on grouting. The rest is curing time and waiting. For beginners it’s a good first tiling job, because the area is small and wall tiles are light enough to hold in one hand.
A bloke came in recently with photos on his phone, asking what he’d done wrong. Nothing, really. The tiles were level, the running bond was clean, the grout joints were even. He’d started at one wall and worked straight across, so the run ended on a strip of cut tile barely wider than a finger. That’s setting out, and it’s the part I’d slow down for.
Before any of that, though, you need the right gear sitting on the bench.
What You Need Before You Start

Tiling a kitchen splashback runs in six stages: prepare the wall, set out the layout, apply adhesive, lay the tiles, grout the joints, then silicone the edges. Allow a weekend rather than a day, because the adhesive needs around 24 hours to cure between laying and grouting.
What you need to tile a splashback is a short list, and most of it you probably half own already. Two things go wrong at this stage. People measure the area, buy exactly that many tiles, and leave themselves nothing for cuts and breakages. Or they buy a floor adhesive for a wall and spend the afternoon watching tiles slide.
Tools:
- Tape measure, pencil and spirit level
- Notched trowel, 6mm or 8mm
- Tile cutter
- Rubber grout float, sponge and bucket
- Drop sheets, masking tape and a caulking gun
- Safety glasses and gloves
Materials:
- Tiles, plus a waste allowance
- Tile adhesive and tile spacers
- Primer, if you’re tiling onto bare plasterboard
- Grout
- Neutral-cure silicone
Tiles. Most of the cost of a DIY tile splashback is the tiles themselves, so get the quantity right before you buy. Measure the area and add 10 percent for cuts and breakages, or up to 15 percent for a diagonal or patterned layout. Our online tile calculator builds the 10 percent allowance in for you.
Adhesive. A 20kg bag of cement-based adhesive such as Drymastic or Monoflex covers roughly 7 to 10 square metres, depending on tile size, notch and how flat the wall is. Premixed wall adhesive works out around 2kg per square metre. One bag or bucket covers most splashbacks, but allow 5 to 10 percent on top.
Which one to buy. If you’ve never tiled and the wall is flat plasterboard, go premixed. A non-slump product like Tilemastic needs no mixing and holds the tile where you put it. Cement-based is stronger and more flexible, so use it over existing tiles or any substrate that moves.
A customer measured her splashback to the millimetre and bought precisely that many tiles. She cracked three on the first afternoon, and by the time she came back in, the batch had moved on. The replacements sat a shade off against the rest of the wall. Three tiles’ worth of waste allowance would have saved her the job.
You’ll find the adhesive and grout for the job in one place, and all of it carries a ten-year product guarantee.
With the gear sorted, the first real decision is what to do about whatever is on the wall now.
Tile Over Or Strip Back?
The honest answer depends entirely on what that surface is. Some you can tile straight over. Some will let go and take your new tiles with them.
| Existing surface | Can you tile over it? | What to do |
| Painted plasterboard | Yes | Clean, sand back any gloss, prime |
| Existing ceramic tiles | Usually, with conditions | Check every tile is sound, clean, key the surface, use a cement-based adhesive |
| Glass splashback | Not recommended | Remove it. Tiles will not bond reliably to glass |
| Acrylic or laminate panel | No | Remove it |
| Damaged or water-affected plasterboard | No | Cut out and replace the sheet |
My recommendation is to strip back wherever you reasonably can. Tiling over adds thickness, and that thickness pushes your new tiles proud of the architraves and window reveals. It also makes the power point cut-outs harder, because the cover plates no longer sit flush against the surface.
Tiling Over An Existing Tiled Splashback
Can you tile over splashback tiles that are already there? Yes, if the existing ones are sound. Tap across the whole area with your knuckle and listen. A hollow, drummy note means that tile has already lost its bond, and anything you stick on top of it comes off together.
Degrease the surface properly, because old kitchen tiles carry cooking grease you cannot see. Key the glaze with coarse sandpaper or prime it so the adhesive has something to grip. Use a flexible cement-based adhesive rather than a premixed product. Then remember you’ve just added another 8 to 10mm to the wall.
Tiling Over A Glass Splashback
Can you tile over a glass splashback? You physically can, but I wouldn’t. Glass is non-porous, so the adhesive has nothing to key into and the bond is unreliable. The bigger problem is what’s holding the glass on. Most panels are siliconed to the plasterboard rather than mechanically fixed, so you’re hanging a wall of tiles off a bead of silicone.
Take the glass off instead. Because it’s siliconed rather than screwed, it usually comes away cleanly once you’ve cut the bead.
Removing The Old Splashback Safely
Cover the benchtop first. Run a blade along the silicone line at the bottom and in the corners, then work a bolster in from one end rather than levering in the middle. Working out from an edge gives the material somewhere to go.
One warning for older Perth homes. If your place was built before 1990, the sheeting behind an old splashback may contain asbestos. Never use an angle grinder, a sander or any other power tool on material that might contain it. If you don’t know what you’re looking at, stop and get it identified. The WA Department of Health guidance sets out who to call and when a licensed removalist is needed.
Once the wall is clear, it needs a bit of work before a single tile goes on it.
Preparing The Wall
This is the part everyone wants to skip, and it’s the part that decides whether your tiles are still on the wall in ten years.
Get it flat. Hold a straight edge across the wall and look for daylight underneath it. Fill the hollows and sand back the lumps. A notched trowel will not correct an uneven wall, and on a gloss tile you’ll see every dip in the way the light runs across the finish.
Clean and degrease. Kitchen walls carry years of cooking grease you cannot see. Wash the area down with sugar soap and rinse it properly, because adhesive will not bond through a film of oil.
Prime bare plasterboard. Plasterboard is porous, and it pulls moisture out of the adhesive before it has cured. An acrylic primer such as Primebond seals the substrate so the adhesive sets the way it’s meant to. Skipping this step is one of the more common reasons a splashback fails.
Protect the benchtop. Tape drop sheets down across the whole bench. Adhesive is unpleasant to get off laminate and it can stain stone.
Support the bottom row where there’s nothing under it. If your splashback runs between two cupboards with a gap below, screw a length of straight timber to the wall, level with the benchtop line. The bottom row sits on the batten while the adhesive cures, and the batten comes off before you silicone. Without it, that first row creeps down the wall overnight and takes the rows above it with it.
Now for the fifteen minutes that decides how the finished job looks.
Setting Out Your Splashback
Everything up to here has been preparation you could do badly and still get away with. This is different. Where you put the first tile determines where every cut lands, and cuts are what the eye notices. It’s one of the more common mistakes that catch people out, and it costs nothing to avoid.
Finding Your Centre Line
Measure the full run and mark the midpoint. Put a spirit level against it and draw a plumb pencil line from the benchtop to the underside of the cupboards. That line is your reference for everything that follows.
If the run has a feature in it, centre on the feature rather than the wall. A rangehood, a window, a cooktop sitting slightly off-centre. The eye reads the splashback against those, not against the ends of the wall, so a layout centred on the rangehood looks right even when it isn’t mathematically centred on the run.
Dry-Laying The First Row
Lay a full row out on the benchtop before you open the adhesive, spacers between every tile, working outward from the centre line in both directions.
- Start with one tile centred on the line, or a joint centred on it, depending on your pattern.
- Work outward in both directions with spacers in place.
- See where the last tile lands at each end.
- If either end leaves a cut narrower than about a third of a tile, shift the whole layout sideways by half a tile.
- Re-check both ends. You want cuts of a similar size at each one.
Two matching cuts at either end read as deliberate. A full tile at one end and a sliver at the other reads as a mistake, which is exactly what happened to the bloke with the photos on his phone.
Fifteen minutes of measuring saves you the one mistake you cannot fix later.
Where The Bottom Row Sits
Do not sit the first row hard down on the benchtop. Leave a gap roughly the width of a tile spacer along the whole benchtop junction, and fill it with silicone at the end rather than grout.
Benchtops move. They expand with heat, they flex under load, and a tile grouted rigidly into that joint will crack along it eventually. The silicone gives it somewhere to go.
One more thing worth thinking about before you start laying. A running bond, where each row is offset by half a tile, hides small variations far better than a stack bond does. Stack bond runs continuous vertical joints the full height of the splashback, and any misalignment shows down the whole line. If this is your first go, the classic subway format in a running bond is the forgiving option.
With the layout settled, you can finally open the adhesive.
Laying The Tiles
Two things decide how this stage goes: picking the right adhesive for your wall, and spreading it in patches small enough that it’s still workable when the tile goes on.
Adhesive And Notch Size
Which adhesive you’re using is already settled. What matters now is the notch, because the notch controls how much adhesive ends up behind each tile.
Match the notch to the tile. A 6mm notch suits mosaic sheets and small-format tiles. An 8mm notch suits standard wall tiles. If you’re mixing a cement-based product from powder, aim for a thick toothpaste consistency that holds its ridges without slumping.
The point of the notch is full contact behind the tile. AS 3958:2023 sets the adhesive coverage requirements for tile installation, and voids behind a tile are what cause it to crack or let go later. Bed a tile, lift it straight back off, and look at the back. If it isn’t fully covered, your ridges are too shallow or the adhesive has started to skin.
Working In Sections In Perth Heat
Spread only what you can tile in about ten minutes. A metre square is plenty.
The open time printed on the bag assumes reasonable conditions, and a Perth kitchen in February is not reasonable conditions. Heat skins the surface of the adhesive far faster than the instructions suggest, and a tile bedded into a skinned bed never bonds properly. If it’s gone tacky and dull before you get to it, scrape it off and spread fresh.
Then work through the run:
- Spread the adhesive with the notched trowel, holding it at a consistent angle so the ridges come out even.
- Lay the first tile against your centre line, sitting on spacers above the benchtop.
- Press and twist slightly to bed it. Do not slide it into position.
- Work outward along the row, spacers between every tile.
- Check with the spirit level every five or six tiles, not at the end of the row.
- Wipe adhesive out of the joints as you go, while it’s still soft.
- Build upward row by row, keeping the pattern consistent.
- Leave the spacers in until the adhesive has cured.
Check the level as you go, not at the end. A row that’s drifted 2mm out over six tiles is a two-minute fix. The same drift found at the end of a three-metre run means lifting most of the row.
Mosaic sheets go on differently. You’re aligning sheet edges rather than individual tiles, and the joint between two sheets has to match the joints within them or the grid breaks visibly across the wall. Use a 6mm notch and check the sheet spacing as you go.
That covers the flat runs. The awkward bits are next.
Cutting Around Power Points, Sinks And Corners
This is where most people’s confidence goes. None of them are difficult. They just need marking out properly before the cutter comes anywhere near the tile.
Power Points
Start with the part that isn’t optional. In Western Australia, all electrical work has to be carried out by a licensed electrician, and that includes taking a power point cover plate off and putting it back on. Homeowners cannot legally do this themselves here, unlike some other states. Contractor licences carry an EC prefix and electrician licences an EW prefix, and you can check either through the public licence search.
Book them for two short visits: once to isolate the circuit and pull the cover plates before you start, and again to refit them after the splashback has cured. Perth trades book out, so make the call before you buy your tiles rather than the night before.
For the cut itself, use the cover plate as your template. Mark around it on the tile, then cut a few millimetres inside those lines so the plate overlaps the cut edge when it goes back on. The plate hides a rough edge. It will not hide a hole that’s too big.
Around The Sink
Tiling behind a sink or around a mixer riser is the same idea. Hold the tile in position, mark where the obstruction sits at two separate points, then transfer both marks to the face of the tile before cutting. Two points give you the angle. One point gives you a guess.
Cut edges belong against the wall or tucked under the tap flange. Never leave a cut edge facing into the room where you’ll see it every day.
Corners And Exposed Edges
Cut tiles go into internal corners, with the cut edge butted right into the corner. That joint gets siliconed at the end, which hides the cut completely.
External edges need more thought, because there’s nothing to hide behind. Either finish with a tile trim, or if your tiles have a glazed edge, turn that edge outward and leave it exposed. What you don’t want is a raw biscuit edge on show at the end of the run.
Once all the cuts are in and the last tile is bedded, leave it alone until tomorrow.
Grouting And Finishing The Edges
Grouting is where a good tiling job either holds together or starts letting water in behind it, and almost all of that comes down to timing.
Wait for the adhesive to cure. Give it around 24 hours before you grout, and check that no tile shifts under thumb pressure first. Cooler or damp conditions need longer, so read the bag rather than the clock. There’s more detail on grouting tiles properly if you want the full run-through.
Pull the spacers and clean the joints. Take every spacer out and scrape away any adhesive sitting proud in the joints. Grout laid over a lump of adhesive sits too thin at that point and cracks along it within months.
Grout the joints. Hold the float at about 45 degrees and work diagonally across the joints rather than along them. Working diagonally packs grout in. Working along a joint drags it back out. A flexible grout like Kemgrout suits splashback joints up to 5mm, and its mould resistance earns its keep directly behind a cooktop. If you’re still deciding on colour, picking a grout colour changes how the whole splashback reads.
Wipe at the right moment. Wait 10 to 20 minutes after applying, then come back with a barely damp sponge. Too early and you pull grout straight back out of the joints. Too late and you’re scrubbing haze off glazed tile for an hour. Rinse the sponge constantly and wring it out properly, because a wet sponge washes the colour out of fresh grout.
Silicone the movement joints. Neutral-cure silicone goes along the benchtop junction, into both internal corners, and along the bottom row where the timber batten was. These are the joints that move, and grout in them will crack. Mask both sides first, run the bead, tool it smooth with a wet finger, then pull the tape off before the silicone starts to skin.
That’s the job done. The only question left is whether it was the right job to take on yourself.
Frequently Asked Questions
So, Should You Tile Your Own Splashback?
For most Perth kitchens, yes. This is a job a careful first-timer can do well, and if you take the time to work out how to tile a kitchen splashback properly before you start, the result will hold up next to anything a tiler would produce. The finish comes down to the fifteen minutes you spend setting out, not to how good you are with a trowel.
Two situations where I’d get a tiler in instead. Large-format tiles are heavy to hold in position while the adhesive grabs, and they show every imperfection in an uneven wall. And if the wall is visibly bowed or the corner is out of square, the cuts compound across the run and the job gets away from you fast.
Everything else is a weekend and a bit of patience. Come and see the splashback tiles in our Guildford showroom, where you can hold a tile against a grout colour in daylight before you commit to either. We’re at 57 James Street, and Perth Metro delivery is a flat $100, whatever you purchase.
